Created
July 23, 2023 22:29
-
-
Save aubymori/a8b91e3869219aaba93d246fa774cf50 to your computer and use it in GitHub Desktop.
Revisions
-
aubymori created this gist
Jul 23, 2023 .There are no files selected for viewing
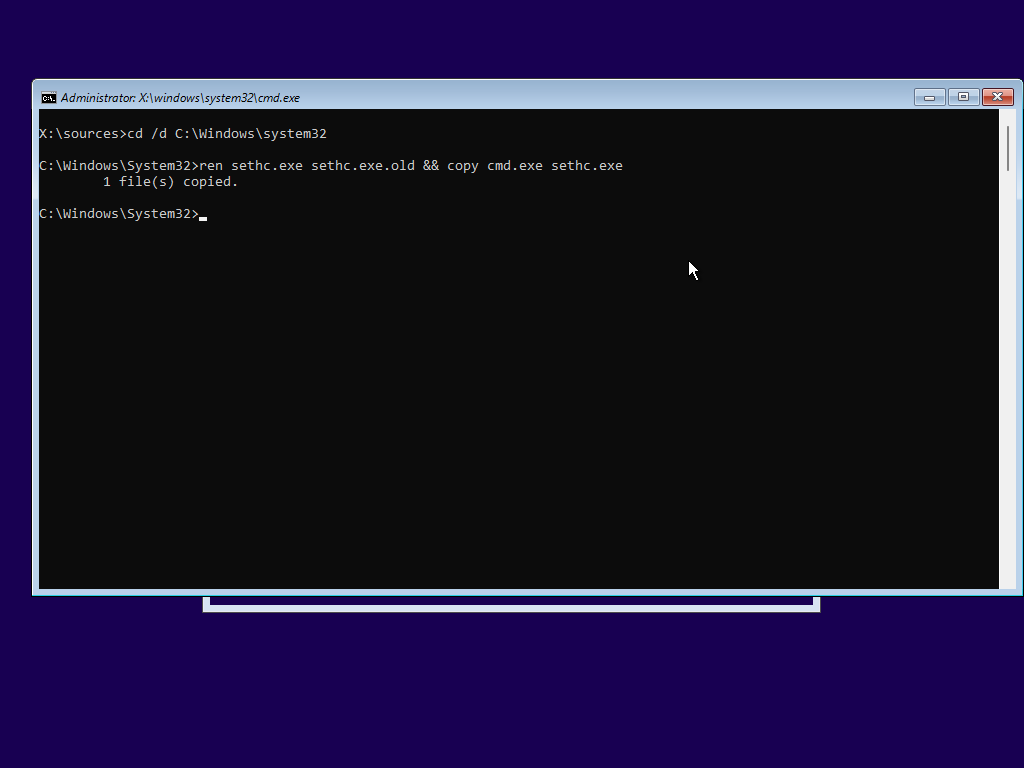
This file contains hidden or bidirectional Unicode text that may be interpreted or compiled differently than what appears below. To review, open the file in an editor that reveals hidden Unicode characters. Learn more about bidirectional Unicode charactersOriginal file line number Diff line number Diff line change @@ -0,0 +1,72 @@ # Installing Windows manually (UEFI) This guide will detail how to manually install Windows 8 and up on a UEFI-compliant system. This has many benefits: - Bypass the mandatory product key input on Windows 8.x - Bypass the hardware requirements check on Windows 11 - Full control of your partition layout - Editing the registry of your new install without booting back into the PE or going through OOBE I will be using Windows 11 Pro 22H2 as an example for this. ## Disk setup Once you've booted into your installation media, hit `SHIFT` + `F10` on your keyboard. This will open a Command Prompt window. 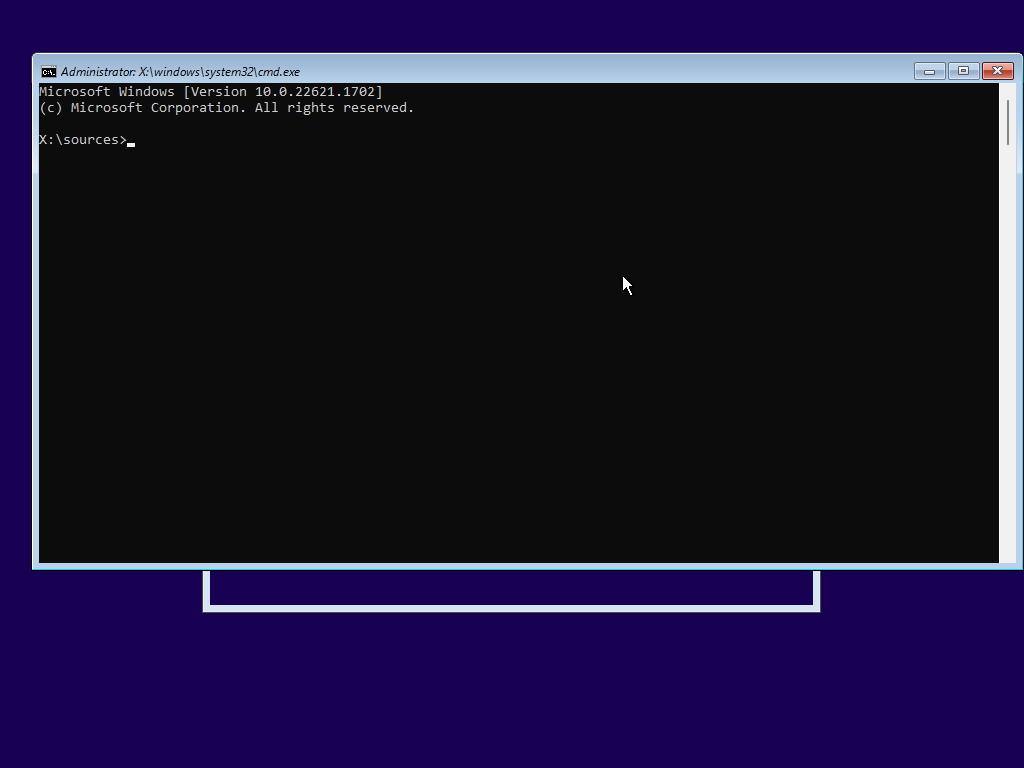 From there, enter the `diskpart` command, list the disks on your computer with `lis dis`, and select the disk you want to install Windows on with `sel dis <index>`. It's recommended you wipe your disk clean before installing Windows, this can be done with `cle`. You will then need to convert your disk to GPT format with `con gpt`, else you won't be able to install Windows with UEFI. If you hard disk is already blank, like when you use a new VM, you can skip wiping your disk. 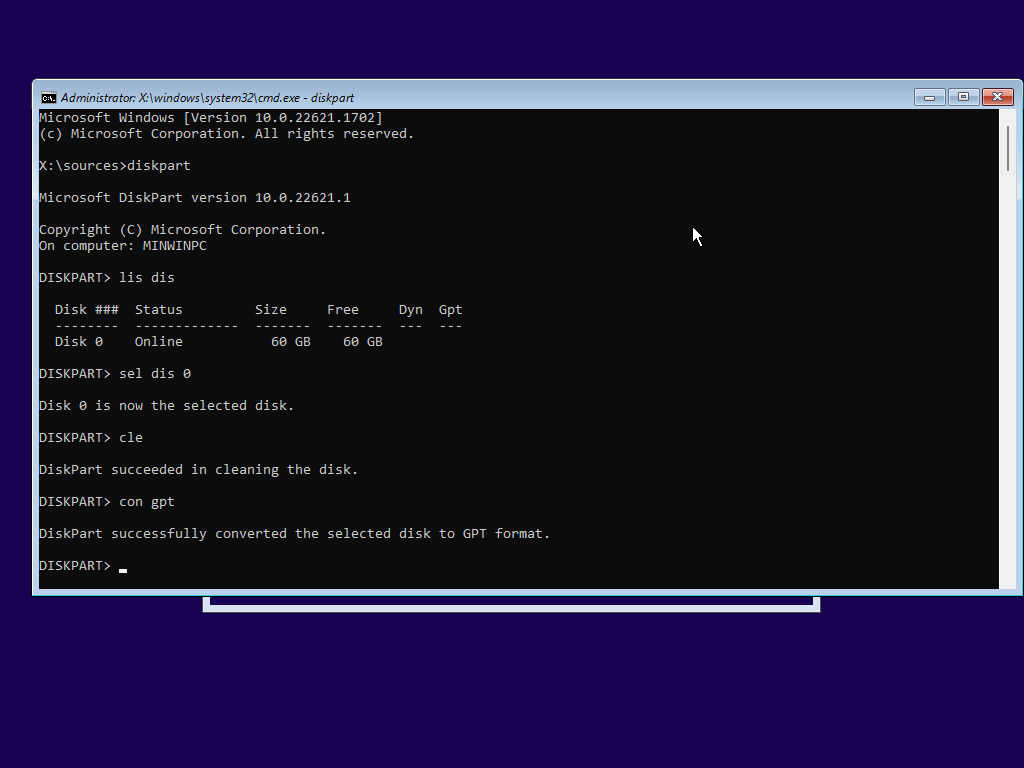 From here, we need to create our EFI partition. This can be done with `cre par efi size=<MB>`. I recommend making this around 300 MB. From here, diskpart automatically selects this partition, so we can format it with `for fs=fat32 quick`. Then, we assign the partition a letter with `ass letter <letter>` (haha yes, ASS). Here, I chose W.  Then we can create our primary partition; this is mostly the same as the previous, and these commands are more rigid, so here they are. ``` > cre par pri > for fs=ntfs quick > ass letter c ``` 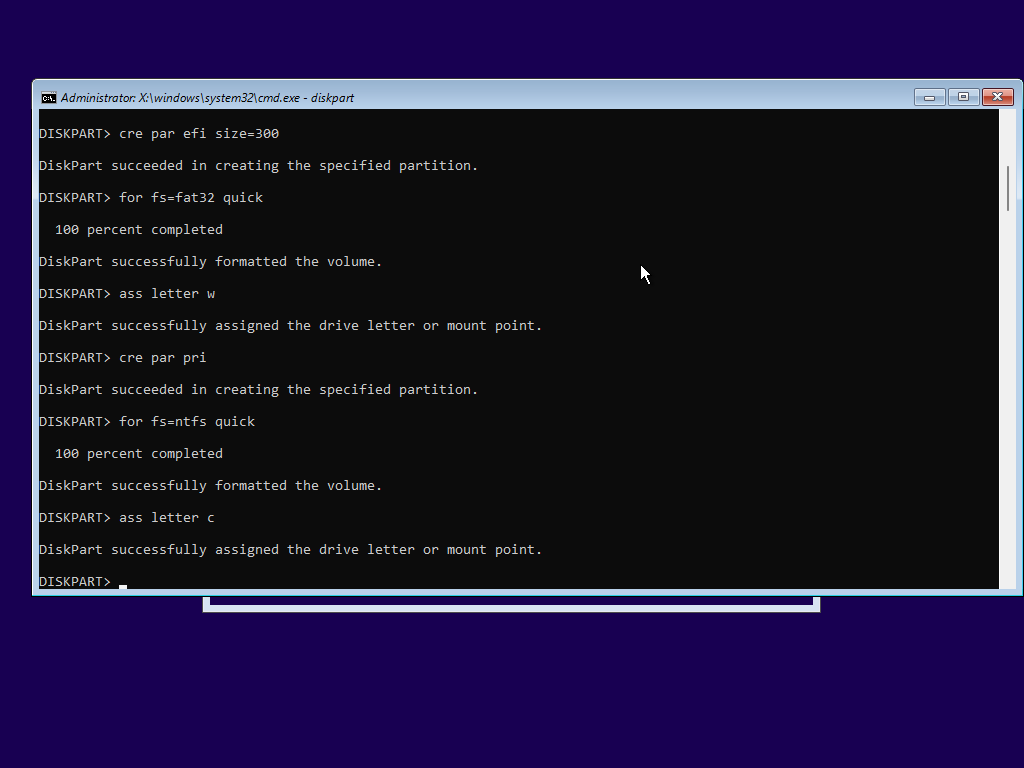 We are now done with diskpart, so you can exit it by typing `exi`. ## Installing Windows Next is the part where you actually install Windows onto your drive. Chances are, your installation media comes with multiple editions of Windows, which are indexed by number. You need to figure out which number corresponds to the edition you want. This can be done with `dism /get-imageinfo /imagefile:<path>`. The image file is what actually contains the files for Windows, and it is most of the time located at either `D:\sources\install.wim` or `D:\sources\install.esd`, but the drive letter may vary. 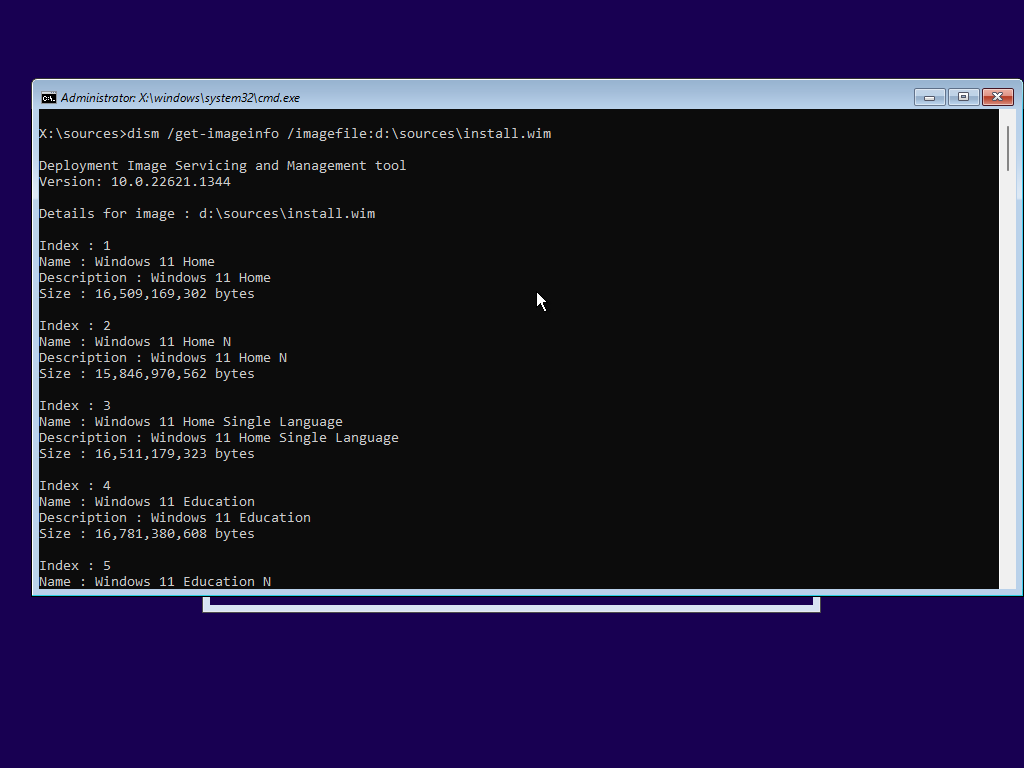 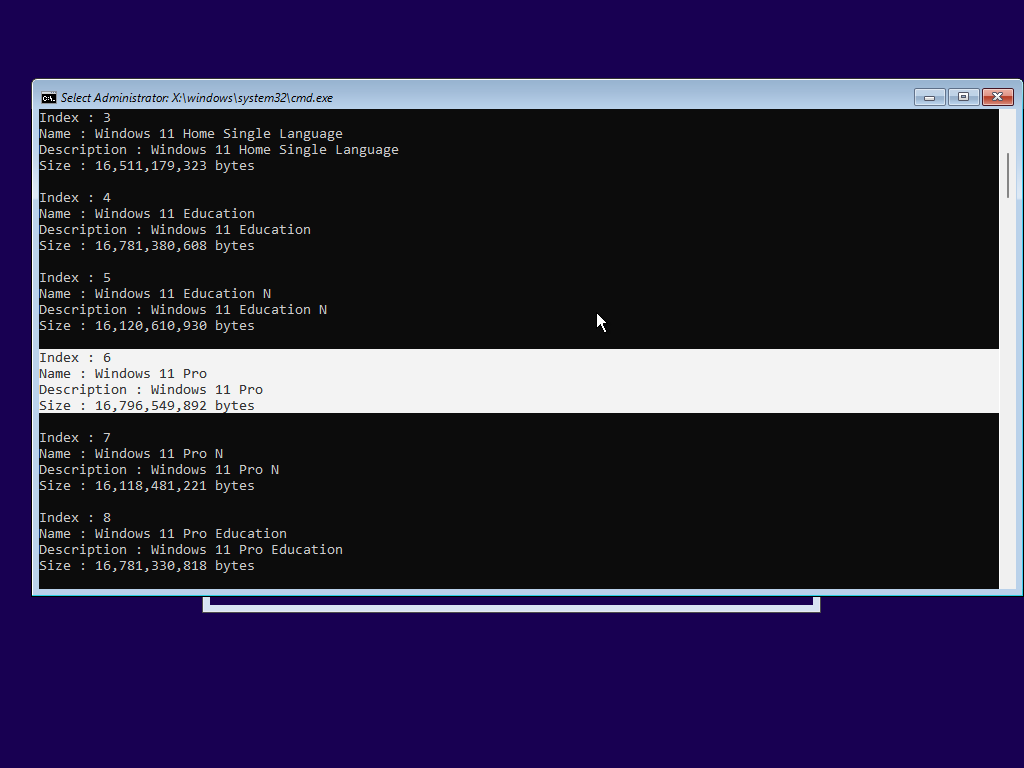 I want Windows 11 Pro, and as you can see from the screenshot above, it is at index 6. Next, we need to actually apply the image to our C: drive. This can be done with `dism /apply-image /imagefile:<path> /index:<index> /applydir:<dir>`.  Next, we need to make it bootable. This can be done with `bcdboot C:\Windows /s <EFI drive>`. 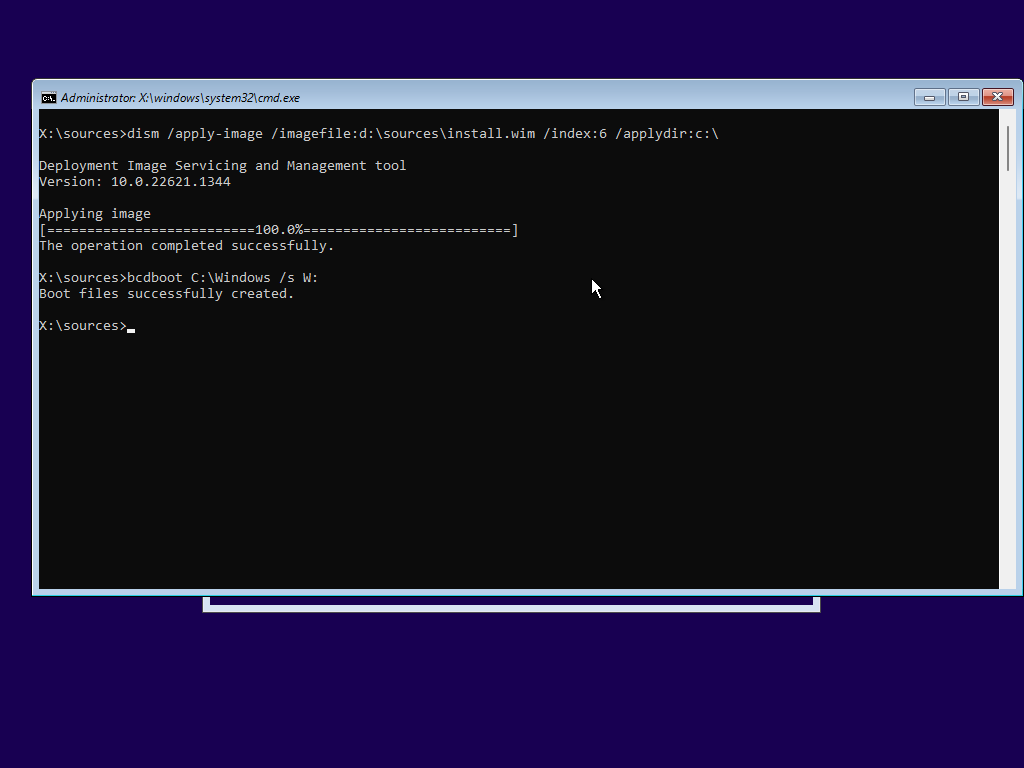 You're done! Windows is now installed and you can now reboot by typing the `wpeutil reboot` command, or you can stick around for the additional tweaks to your install. ## Additional tweaks Here are just a few additional tweaks you can do before booting into your new install ### Registry editing The keys of `HKEY_LOCAL_MACHINE` are located in `C:\Windows\System32\config`, and they can be loaded in the PE's regedit via `File > Load Hive...`. 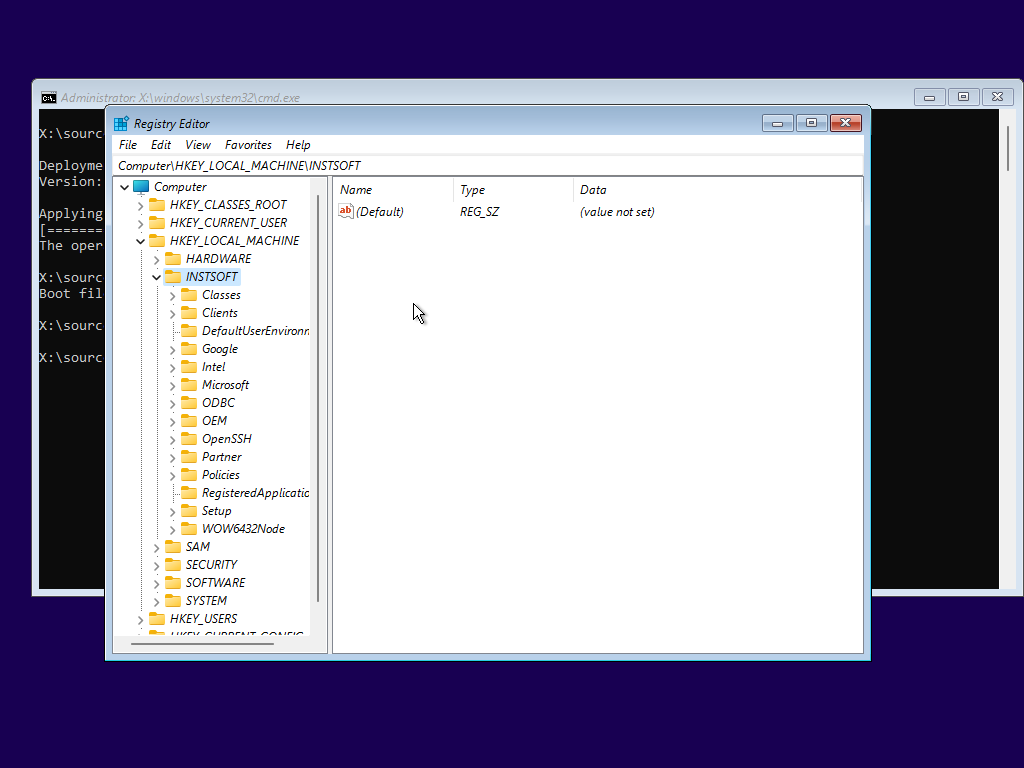 ### sethc hack This will replace that pesky Sticky Keys dialog with a Command Prompt, so that you can easily invoke a Command Prompt at any time (including on the login screen!). Just go into `C:\Windows\System32` with `cd /d C:\Windows\System32` and run `ren sethc.exe sethc.exe.old && copy cmd.exe sethc.exe`.