|
|
@@ -1,5 +1,12 @@ |
|
|
how to leverage oracle's temping offers |
|
|
|
|
|
## free tier limits |
|
|
|
|
|
The limits of the free tier say that you can create up to 4 instances. |
|
|
- x2 x86 instances (2core/1g) |
|
|
- x2 ampere instances (with 4core/24g spread between them) |
|
|
- 200GB total boot volume space across all intances (minimum of 50G per instance) |
|
|
|
|
|
## create your account |
|
|
|
|
|
The first step is to create your oracle cloud account here: https://signup.cloud.oracle.com/ |
|
|
@@ -14,42 +21,79 @@ Log into your new account you created above. |
|
|
|
|
|
## create a vm instance |
|
|
|
|
|
On the home screen, there should be an option to "create a vm instance". If not, you can select compute > instances from the left side menu. |
|
|
On the home screen, there should be a hamberger button in the top left. Click it, and the resource pane opens. Select "Compute" and then "Instances". |
|
|
|
|
|
 |
|
|
|
|
|
Click on the "Create instance" button on the next page. |
|
|
|
|
|
 |
|
|
|
|
|
|
|
|
## name & region |
|
|
|
|
|
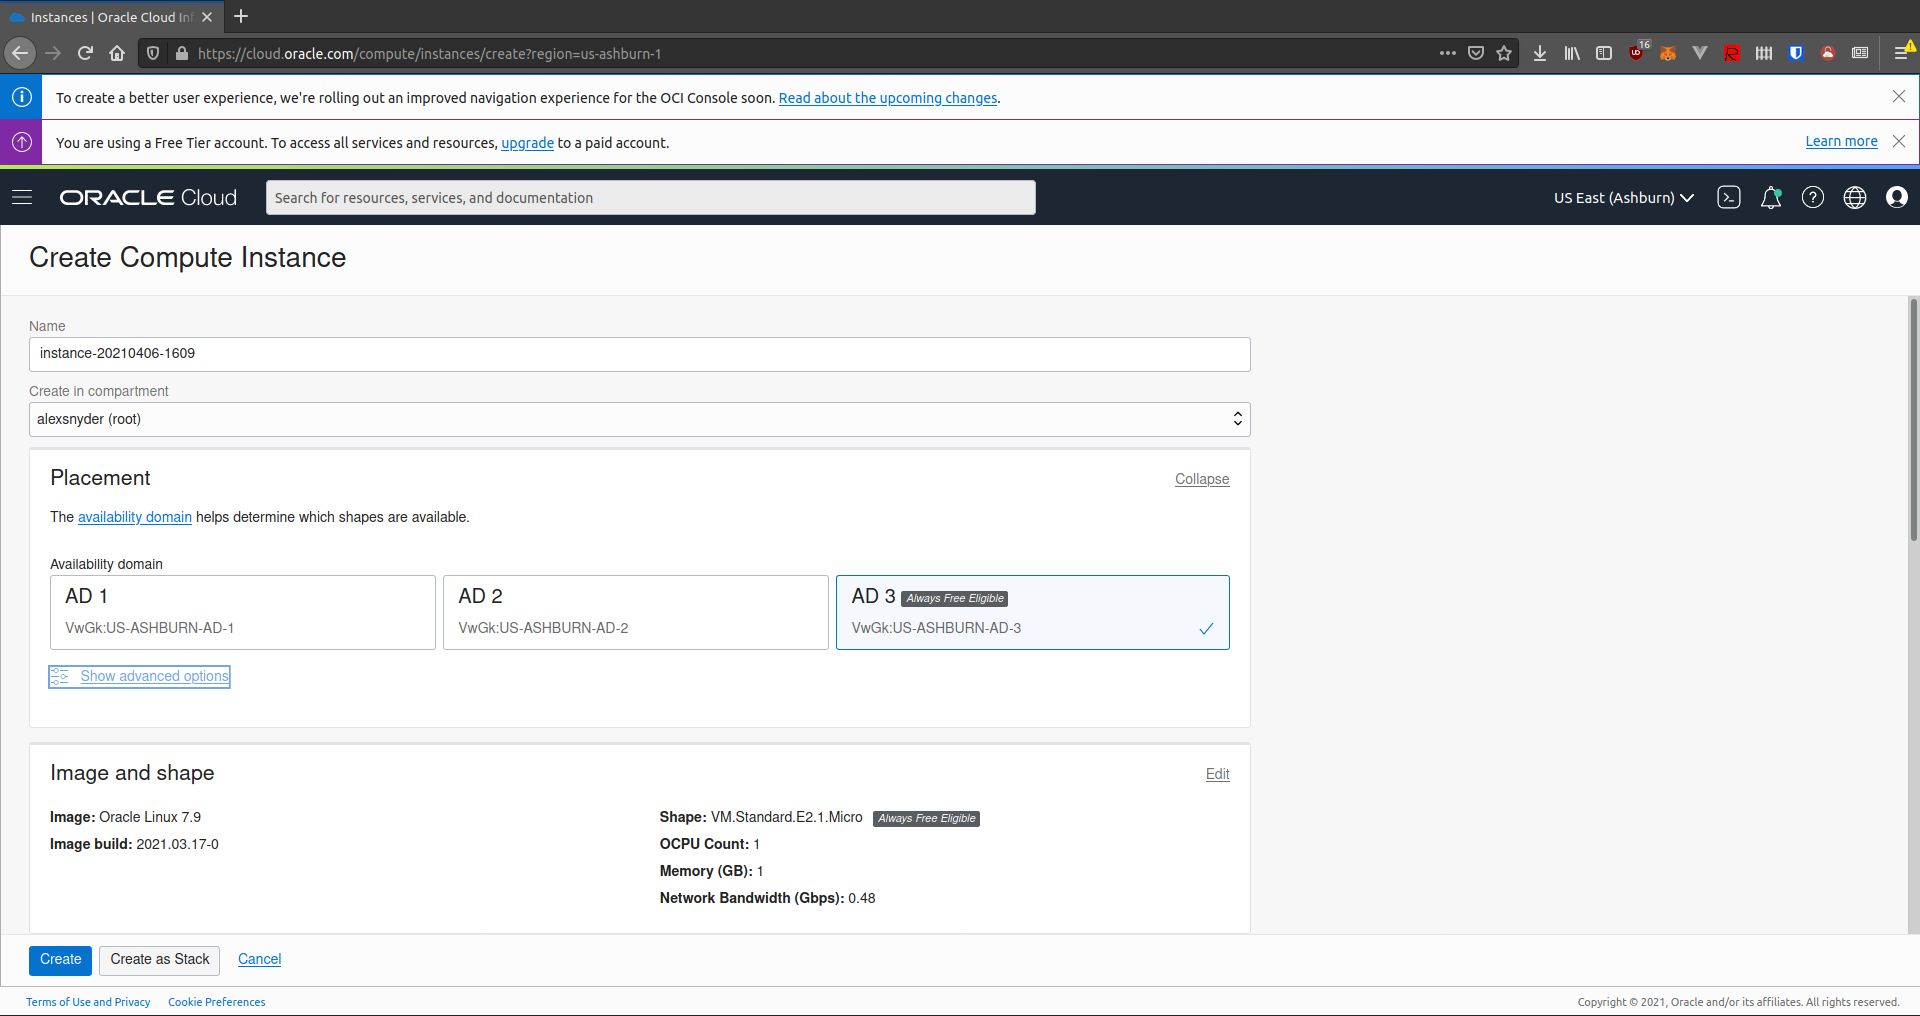
Enter a name for your instance. Then give the form a second to autofill, and a region should be selected with the "Always Free-eligible" badge to the right. |
|
|
|
|
|
 |
|
|
|
|
|
## shape |
|
|
|
|
|
Click "edit" next to "Image and Shape", and then "Change shape". |
|
|
|
|
|
 |
|
|
|
|
|
### x86 |
|
|
|
|
|
 |
|
|
To create an instance with an x86 based processor, just leave everything default and click "Select shape". |
|
|
|
|
|
## region |
|
|
 |
|
|
|
|
|
The form may take a second or two to load all the default values. This is important as it will select the region that is currently avalible for "always free" resources. |
|
|
### arm |
|
|
|
|
|
 |
|
|
To create an instance with an arm processor, select "Ampere" and then check the box next to "VM.Standard.A1.Flex". |
|
|
|
|
|
Make sure the region that is selected has the badge that reads "always free eligable". |
|
|
 |
|
|
|
|
|
## image and shape |
|
|
Then you are given a CPU and Memory slider. You have 4 cores and 24G to use between your (max of) 2 instances. You can give one instance all 4 cores and 24G or make two instances with a variable size. |
|
|
|
|
|
Click on "edit" next to "image and shape". This part is personal preference, but I perfer to select ubuntu as my OS, feel free to browse and select the one that works best for you. |
|
|
 |
|
|
|
|
|
 |
|
|
## image |
|
|
|
|
|
Make sure the shape that is selected has the badge that reads "always free eligable". |
|
|
Click on "Change image" next. |
|
|
|
|
|
## add ssh keys |
|
|
 |
|
|
|
|
|
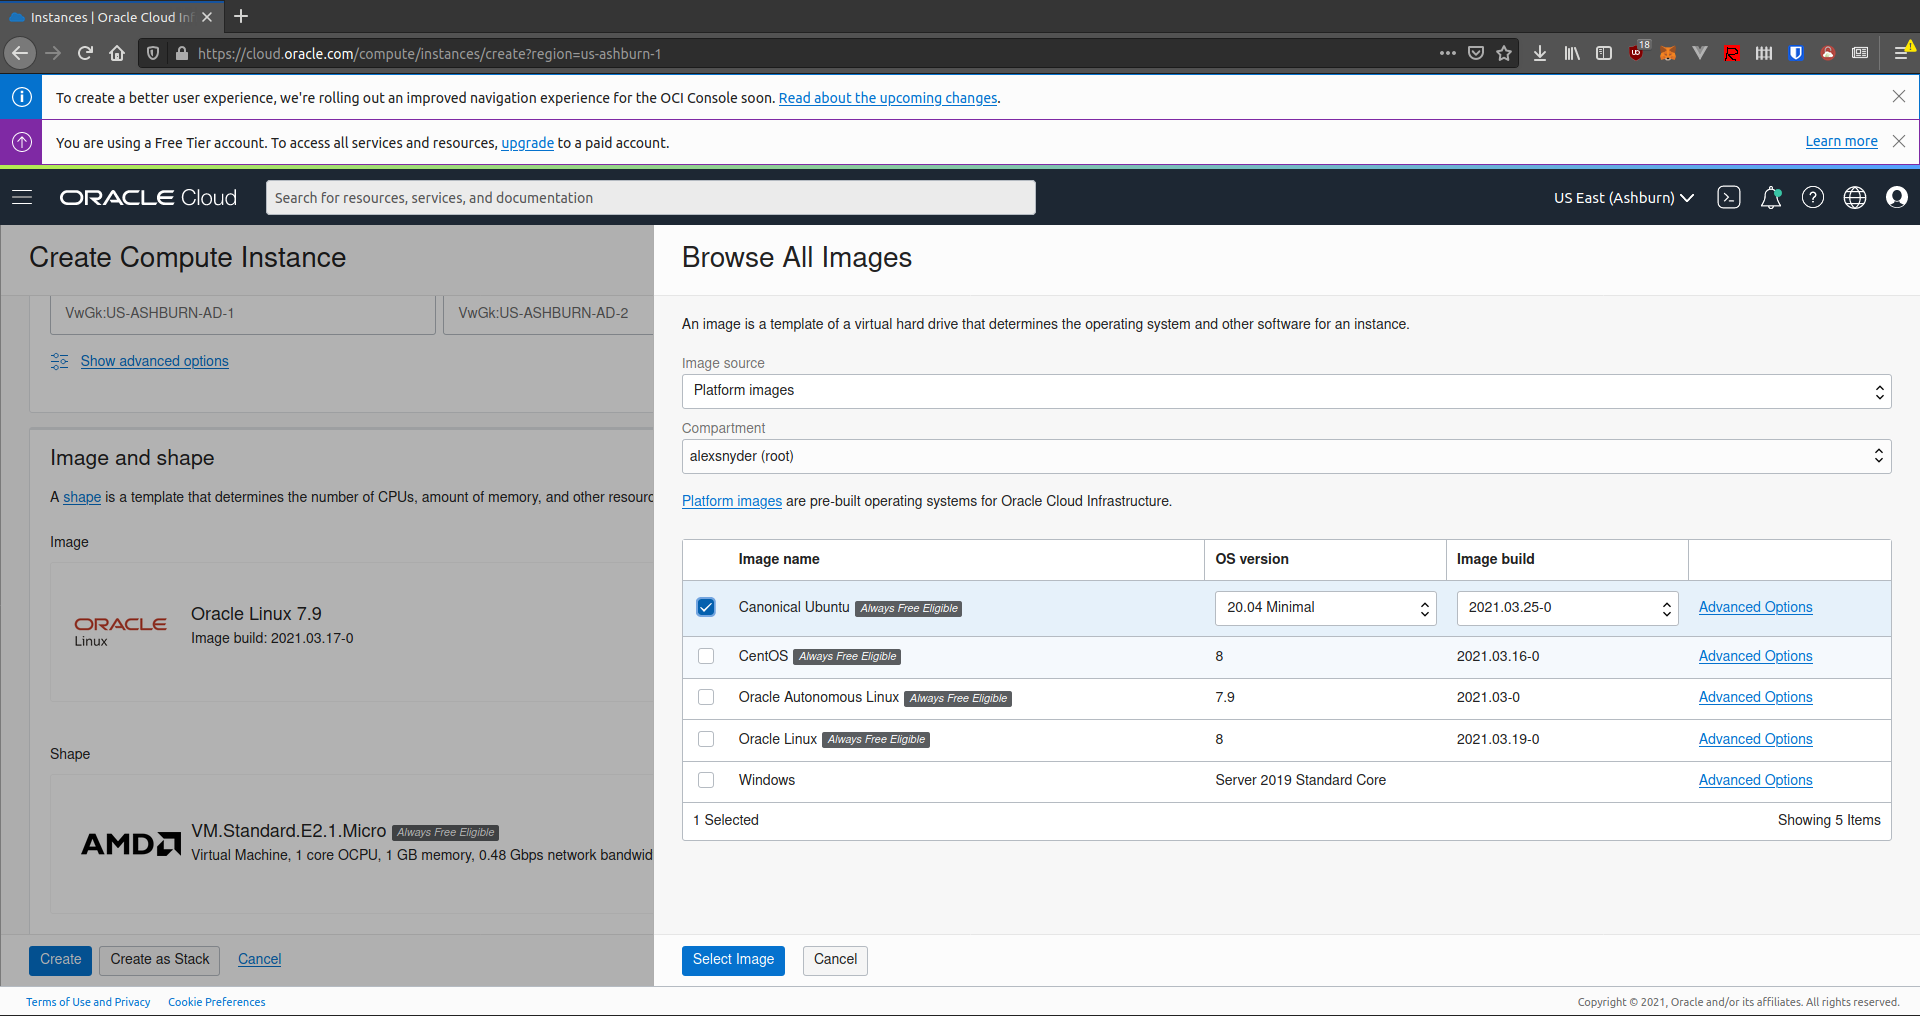
This choice is personal preference. Choose the Image Name, OS, and Build based on what you need. |
|
|
|
|
|
 |
|
|
|
|
|
Then click "Select image" at the bottom. |
|
|
|
|
|
## networking |
|
|
|
|
|
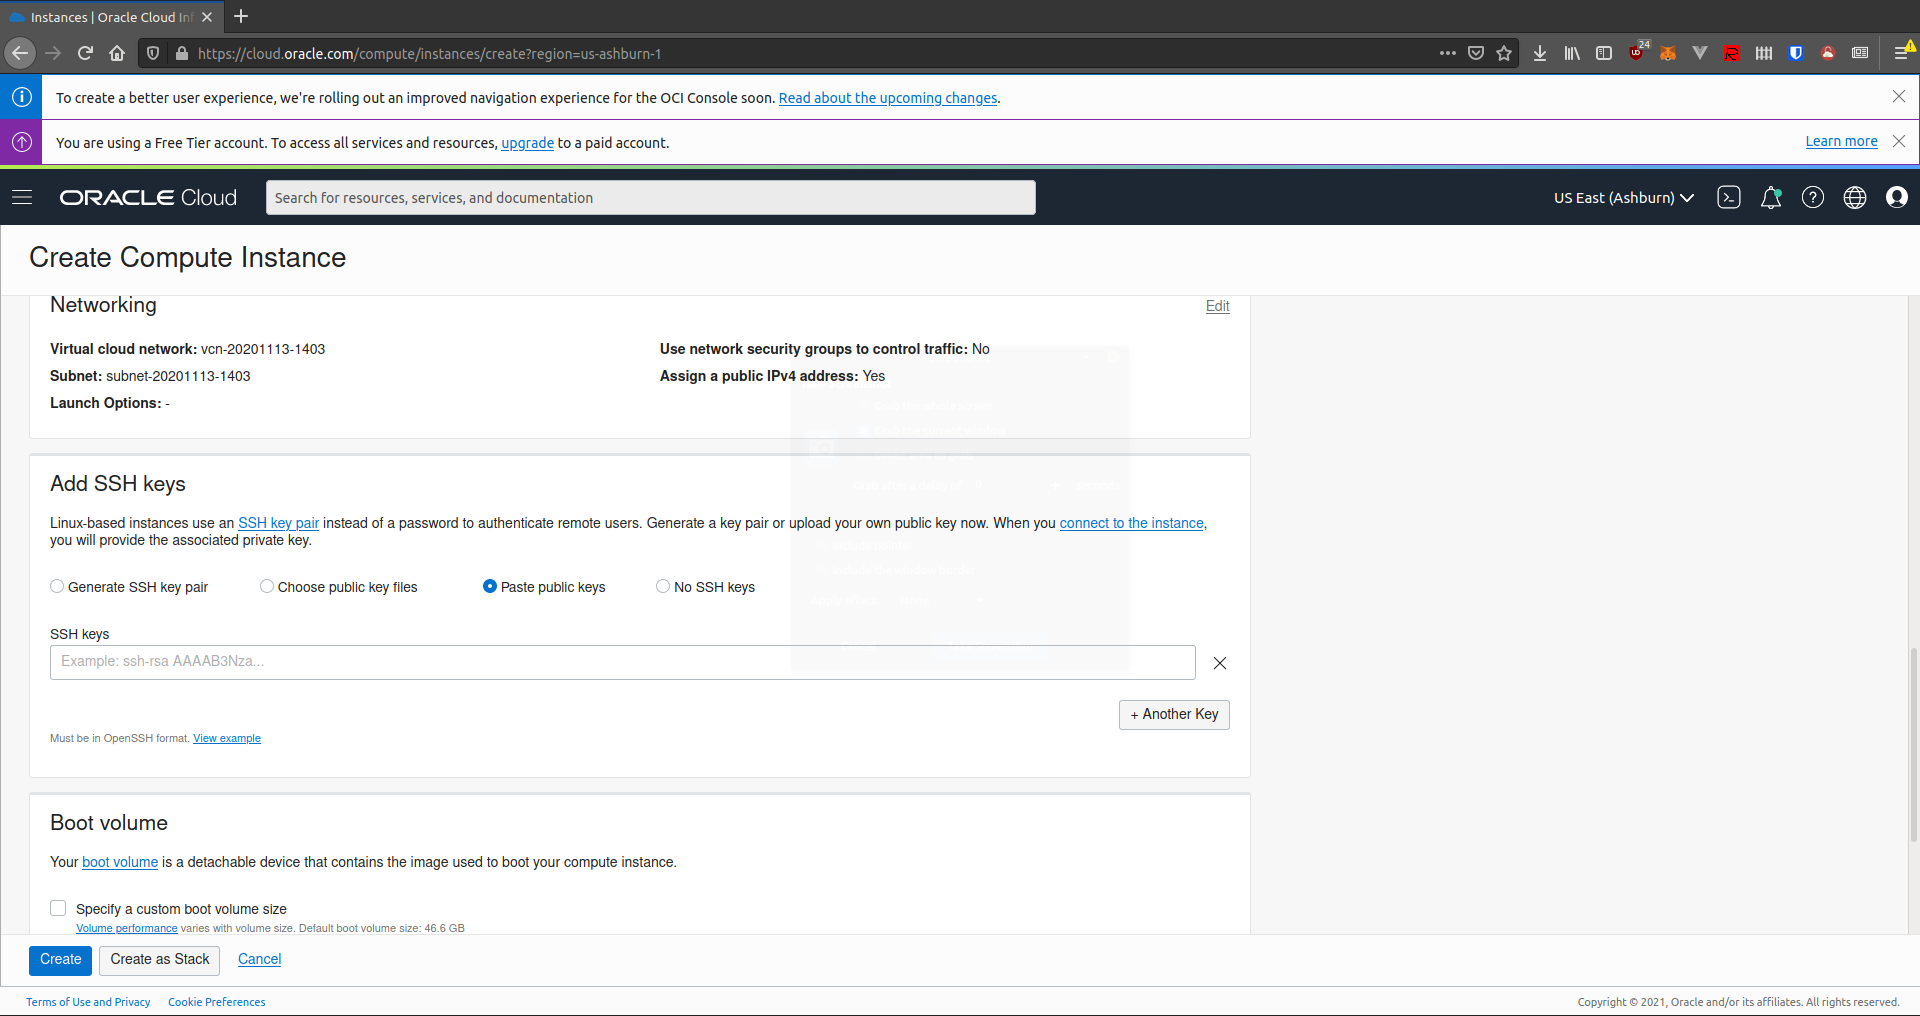
I usually don't change any defaults here, but you can at your discretion. |
|
|
|
|
|
## ssh keys |
|
|
|
|
|
Next, under the ssh section, select "paste public keys" and paste in your public key (normally found in `~/.ssh/id_rsa.pub` in most \*nix like systems). You can also upload that file, or generate a key-pair from within the options. |
|
|
|
|
|
 |
|
|
 |
|
|
|
|
|
## boot volume |
|
|
|
|
|
Most of the time this section can be left as default. |
|
|
|
|
|
 |
|
|
|
|
|
You have 200G of disk space in the free tier, and if you use up 4 VMs then the minimum disk size of 50G (the default) is fine. If you plan to make fewer instances than 4, you can adjust the size as needed. |
|
|
|
|
|
## deploy |
|
|
|
|
|
You should be finished will all the options that need to be set (feel free to customize other options, but some options will incurr charges so YMMV). |
|
|
 |
|
|
|
|
|
You will be dropped to a loading screen, and after a few it will turn green and display a public ip that you can now `ssh` with the username `ubuntu` and the private key of the public one you specified above. |
|
|
|
|
|
 |
|
|
|
|
|
`ssh [email protected]` |
|
|
|
|
|
## free tier limits |
|
|
|
|
|
The limits of the free teir say that you can create two of these VMs as we created above. |
rssnyder revised this gist