The usecase of the application will be list all bucket objects to apecific users that register themselves with the application.
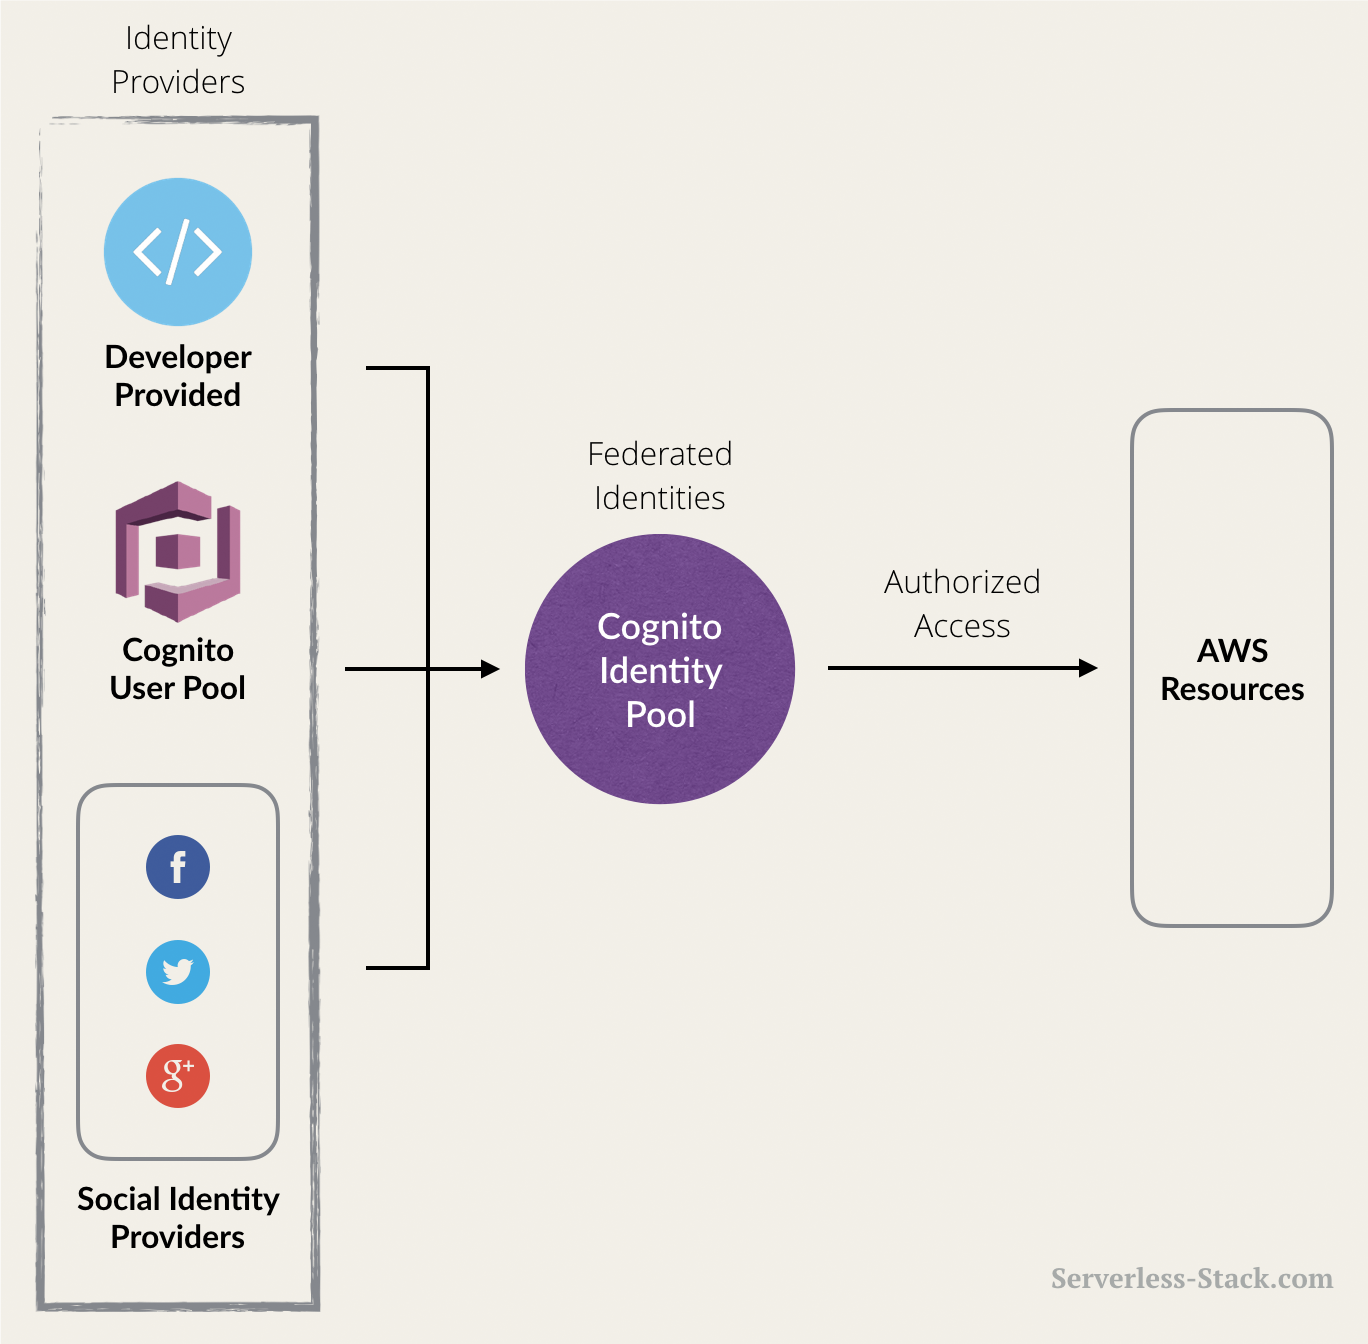
Create a workflow for the whole application and build dependency of various resources on each other. The given static React application will use Cognito to authenticate and authorize the user to fetch resource details from AWS. This will help the application to fetch temporary AWS credentials in the form of JWT tokens to access the AWS resources.
- Create Cognito User Pool
- Create application client for User Pool
- Create Cognito Identity pool from the user pool and application client
- Modify Cognito User Pool auth IAM role to access specific AWS resources (here, S3)
- Create S3 bucket for hosting the static website
- Allow public access on the S3 bucket
- Add bucket policy to list all objects
- Set up CORS policy for the bucket
- Enable
static website hostingfor the bucket and set theindex document
- Create the enviroment for developing a React application. Install libraries and SDKs (
aws-sdk) for the application. - Bootstrap the react application
- Build various components like login, logout, signup, etc and also a page to show resource specific data.
- Integrate the components to use the login/logout flow of Cognito IdP.
- Copy the contents from the build directory of the React application to the root directory of the S3 bucket that we created in the former steps.
- Goto the S3 console of the bucket and make all the files public by selecting them all
- To visit the site, go to the
endpointin the Static Website Hosting section of bucket properties