Last active
December 25, 2024 11:34
-
-
Save awesomebytes/c932b2502fab32d0c8bb to your computer and use it in GitHub Desktop.
Revisions
-
Sammy Pfeiffer revised this gist
Oct 24, 2016 . 1 changed file with 1 addition and 1 deletion.There are no files selected for viewing
This file contains hidden or bidirectional Unicode text that may be interpreted or compiled differently than what appears below. To review, open the file in an editor that reveals hidden Unicode characters. Learn more about bidirectional Unicode charactersOriginal file line number Diff line number Diff line change @@ -63,7 +63,7 @@ To install it follow the [installation instructions](http://damnwidget.github.io Go to View > Show Console and paste: ```` import urllib.request,os,hashlib; h = 'df21e130d211cfc94d9b0905775a7c0f' + '1e3d39e33b79698005270310898eea76'; pf = 'Package Control.sublime-package'; ipp = sublime.installed_packages_path(); urllib.request.install_opener( urllib.request.build_opener( urllib.request.ProxyHandler()) ); by = urllib.request.urlopen( 'http://packagecontrol.io/' + pf.replace(' ', '%20')).read(); dh = hashlib.sha256(by).hexdigest(); print('Error validating download (got %s instead of %s), please try manual install' % (dh, h)) if dh != h else open(os.path.join( ipp, pf), 'wb' ).write(by) ```` ### Install Anaconda plugin trough package control -
Jan 29, 2016 . 1 changed file with 20 additions and 0 deletions.There are no files selected for viewing
This file contains hidden or bidirectional Unicode text that may be interpreted or compiled differently than what appears below. To review, open the file in an editor that reveals hidden Unicode characters. Learn more about bidirectional Unicode charactersOriginal file line number Diff line number Diff line change @@ -284,3 +284,23 @@ It will take a bit of time to open and load all the stuff. Then you can do... *F Now on the left you'll have the root folder of the package, open it, if it has code in `src` you must right-click the folder and choose *Mark Directory As > Sources Root* Now you can freely navigate around the code. ## Friendlier Gedit ### Set better defaults Go to `Edit > Preferences`. * Set on tab `View`: `Display line numbers`, `Highlight current line`, `Highlight matching brackets`. * Set on tab `Editor`: `Tab width: 4 spaces`, `Insert spaces instead of tabs`, `Enable automatic indentation`- ### Get Python autocompletion plugin (on current file only) Create a folder for the plugin mkdir -p ~/.local/share/gedit/plugins Checkout the [geditpycompletion](https://github.com/Kazade/geditpycompletion) most updated fork plugin git clone https://github.com/Kazade/geditpycompletion.git ~/.local/share/gedit/plugins/geditpycompletion Enable the plugin going to `Edit > Preferences`, tab `Plugins`, enable `Python Code Completion`. Now you'll get autocompletion control+space. -
Jan 24, 2016 . 1 changed file with 1 addition and 1 deletion.There are no files selected for viewing
This file contains hidden or bidirectional Unicode text that may be interpreted or compiled differently than what appears below. To review, open the file in an editor that reveals hidden Unicode characters. Learn more about bidirectional Unicode charactersOriginal file line number Diff line number Diff line change @@ -51,7 +51,7 @@ To know which key combination you are pressing you can go to "View->Console" and You can always change it from the bottom right menu for any file, but by default we would to always use spaces when using ROS files. Add the following to your User Preferences file (Preferences > Settings - User): "translate_tabs_to_spaces": true, ## Install Anaconda Python IDE 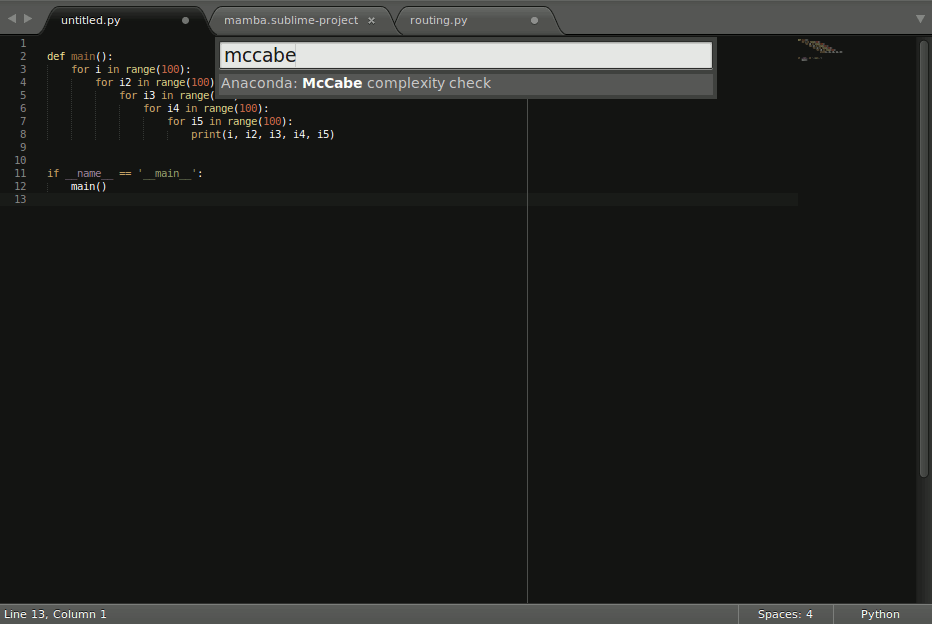 -
Jan 24, 2016 . 1 changed file with 1 addition and 1 deletion.There are no files selected for viewing
This file contains hidden or bidirectional Unicode text that may be interpreted or compiled differently than what appears below. To review, open the file in an editor that reveals hidden Unicode characters. Learn more about bidirectional Unicode charactersOriginal file line number Diff line number Diff line change @@ -115,7 +115,7 @@ To preview doing alt+m. # Install PyCharm  Even tho SublimeText is great, it may lack some maturity that PyCharm may have. For example, it helps you auto-fill documentation strings, convert methods to properties, hints that you can convert something to a static method... etc. The downside is a slower starting time and a Eclipse-like feeling (if that is a downside for you). -
Jan 20, 2016 . 1 changed file with 7 additions and 0 deletions.There are no files selected for viewing
This file contains hidden or bidirectional Unicode text that may be interpreted or compiled differently than what appears below. To review, open the file in an editor that reveals hidden Unicode characters. Learn more about bidirectional Unicode charactersOriginal file line number Diff line number Diff line change @@ -1,5 +1,12 @@ # Python development environment (with ROS!) # Install pip The package manager of python packages is called pip. sudo apt-get install python-pip If you need a pip package as a debian you can use [Victor's debian from pip](https://gist.github.com/v-lopez/da8c4aca89021eb9f801). # Install ipython  -
Jan 20, 2016 . 1 changed file with 3 additions and 3 deletions.There are no files selected for viewing
This file contains hidden or bidirectional Unicode text that may be interpreted or compiled differently than what appears below. To review, open the file in an editor that reveals hidden Unicode characters. Learn more about bidirectional Unicode charactersOriginal file line number Diff line number Diff line change @@ -202,7 +202,7 @@ But you don't need them in `CMakeLists.txt`. # My workflow With these tools, how do I usually work? It depends on what is the main focus: ## Creating a new package I create/go to my ROS workspace, then I create the new package. I create it with `catkin_create_pkg my_awesome_new_package rospy` as I will probably import rospy being a ROS package. Then I create the `scripts` folder. I do a `touch my_script_name.py` and `chmod +x my_script_name.py` and if I feel I'll install the package to test it soon I also edit `CMakeLists.txt` to add the installation rules as said previously. @@ -266,10 +266,10 @@ I start using *Sublime Text* for this. Whenever my script grows too much and it's time to separate it in classes I do all the stuff about the `src` folder I mentioned previously. ## Work on a simple (pre-existing) script I source the workspace in the terminal and open a *Sublime Text* with `subl your_python_file.py`. Note that if you had it already open it won't take into account the stuff in the current workspace, it will stay with the *PATH* variables it had before. ## Work on a complicated (pre-existing) package I source the workspace in the terminal and open a *PyCharm* with `pycharm`. Note that if you had it already open it won't take into account the stuff in the current workspace, it will stay with the *PATH* variables it had before. It will take a bit of time to open and load all the stuff. Then you can do... *File > New Project...* and navigate to the folder of the package and click Create. It will ask you if you want to create a project from the existing sources, say yes. Then it will ask if you want to open the project in the current window or in a new window. Just *Open it in the current window* and choose *Add to currently opened projects*. -
Jan 20, 2016 . 1 changed file with 92 additions and 1 deletion.There are no files selected for viewing
This file contains hidden or bidirectional Unicode text that may be interpreted or compiled differently than what appears below. To review, open the file in an editor that reveals hidden Unicode characters. Learn more about bidirectional Unicode charactersOriginal file line number Diff line number Diff line change @@ -81,7 +81,7 @@ Which will enable Control+Alt+click to go to the declaration. (Control+Click giv You'll get also linting for the code and other goodies, check all it can do at the documentation page. **Note that you must open it from the shell with a sourced environment (source myworkspace/devel/setup.bash) to get autocompletion and such.** ### Ignore a PEP8 on a single line If you ever want to ignore the PEP8 on a line just add at the end of it: '` # NOQA`' note that there are two spaces before the `#` and one after. @@ -134,9 +134,15 @@ I choose the Darcula IDE theme (it's darker) usually, up to the user. ## Editor to have the same color theme as the app itself Go to File > Settings > Editor > Colors & Fonts and choose your Scheme (Darcula for me). Hit Apply. ## Show line numbers by default Go to File > Settings > General > Appearance and check *Show line numbers*. # ROS package with python As you may know ROS packages can contain Python code. It is structured in the following manner: TODO: Give an example package. ## scripts In the `scripts` folder, as the name implies, you'll place the scripts you create. Either the final executable of some awesome library you created or just plain self contained scripts. **You cannot import from somewhere else these files.** @@ -186,3 +192,88 @@ It will fail with: ImportError: No module named your_package.your_package ## Dependencies You must add in package.xml your Python dependences as run dependencies: <run_depend>rospy</run_depend> But you don't need them in `CMakeLists.txt`. # My workflow With these tools, how do I usually work? It depends on what is the main focus: * Creating a new package I create/go to my ROS workspace, then I create the new package. I create it with `catkin_create_pkg my_awesome_new_package rospy` as I will probably import rospy being a ROS package. Then I create the `scripts` folder. I do a `touch my_script_name.py` and `chmod +x my_script_name.py` and if I feel I'll install the package to test it soon I also edit `CMakeLists.txt` to add the installation rules as said previously. Then I open an `ipython` terminal on a side where I'll test stuff like... What fields does this `sensor_msgs.msgs/LaserScan` have? ````python In [1]: from sensor_msgs.msg import LaserScan In [2]: LaserScan? Type: type String Form:<class 'sensor_msgs.msg._LaserScan.LaserScan'> File: /opt/ros/indigo/lib/python2.7/dist-packages/sensor_msgs/msg/_LaserScan.py Docstring: <no docstring> Constructor information: Definition:LaserScan(self, *args, **kwds) Docstring: Constructor. Any message fields that are implicitly/explicitly set to None will be assigned a default value. The recommend use is keyword arguments as this is more robust to future message changes. You cannot mix in-order arguments and keyword arguments. The available fields are: header,angle_min,angle_max,angle_increment,time_increment,scan_time,range_min,range_max,ranges,intensities :param args: complete set of field values, in .msg order :param kwds: use keyword arguments corresponding to message field names to set specific fields. In [3]: LaserScan() Out[3]: header: seq: 0 stamp: secs: 0 nsecs: 0 frame_id: '' angle_min: 0.0 angle_max: 0.0 angle_increment: 0.0 time_increment: 0.0 scan_time: 0.0 range_min: 0.0 range_max: 0.0 ranges: [] intensities: [] In [4]: ls = LaserScan() In [5]: ls. ls.angle_increment ls.header ls.scan_time ls.angle_max ls.intensities ls.serialize ls.angle_min ls.range_max ls.serialize_numpy ls.deserialize ls.range_min ls.time_increment ls.deserialize_numpy ls.ranges ```` And when I know what stuff does I'll add it to my Python script. Then the usual run-and-fix-stuff-and-repeat cycle. I start using *Sublime Text* for this. Whenever my script grows too much and it's time to separate it in classes I do all the stuff about the `src` folder I mentioned previously. * Work on a simple (pre-existing) script I source the workspace in the terminal and open a *Sublime Text* with `subl your_python_file.py`. Note that if you had it already open it won't take into account the stuff in the current workspace, it will stay with the *PATH* variables it had before. * Work on a complicated (pre-existing) package I source the workspace in the terminal and open a *PyCharm* with `pycharm`. Note that if you had it already open it won't take into account the stuff in the current workspace, it will stay with the *PATH* variables it had before. It will take a bit of time to open and load all the stuff. Then you can do... *File > New Project...* and navigate to the folder of the package and click Create. It will ask you if you want to create a project from the existing sources, say yes. Then it will ask if you want to open the project in the current window or in a new window. Just *Open it in the current window* and choose *Add to currently opened projects*. Now on the left you'll have the root folder of the package, open it, if it has code in `src` you must right-click the folder and choose *Mark Directory As > Sources Root* Now you can freely navigate around the code. -
Jan 20, 2016 . 1 changed file with 1 addition and 0 deletions.There are no files selected for viewing
This file contains hidden or bidirectional Unicode text that may be interpreted or compiled differently than what appears below. To review, open the file in an editor that reveals hidden Unicode characters. Learn more about bidirectional Unicode charactersOriginal file line number Diff line number Diff line change @@ -107,6 +107,7 @@ To preview doing alt+m. # Install PyCharm  Even tho SublimeText is great, it may lack some maturity that PyCharm may have. For example, it helps you auto-fill documentation strings, convert methods to properties, hints that you can convert something to a static method, hints you to specify return type... etc. The downside is a slower starting time and a Eclipse-like feeling (if that is a downside for you). -
Jan 20, 2016 . 1 changed file with 0 additions and 5 deletions.There are no files selected for viewing
This file contains hidden or bidirectional Unicode text that may be interpreted or compiled differently than what appears below. To review, open the file in an editor that reveals hidden Unicode characters. Learn more about bidirectional Unicode charactersOriginal file line number Diff line number Diff line change @@ -115,20 +115,15 @@ The downside is a slower starting time and a Eclipse-like feeling (if that is a PyCharm is like a heavily modified Eclipse, so it's based in Java. sudo add-apt-repository ppa:webupd8team/java sudo apt-get update sudo apt-get install oracle-java8-installer ## Actually install PyCharm (Community edition) I find it easier to install it from a repository: wget -q -O - http://archive.getdeb.net/getdeb-archive.key | sudo apt-key add - sudo sh -c 'echo "deb http://archive.getdeb.net/ubuntu trusty-getdeb apps" >> /etc/apt/sources.list.d/getdeb.list' sudo apt-get update sudo apt-get install pycharm You can now just type pycharm to open it. **Note that you must open it from the shell with a sourced environment (source myworkspace/devel/setup.bash) to get autocompletion and such.** -
Jan 20, 2016 .There are no files selected for viewing
This file contains hidden or bidirectional Unicode text that may be interpreted or compiled differently than what appears below. To review, open the file in an editor that reveals hidden Unicode characters. Learn more about bidirectional Unicode charactersOriginal file line number Diff line number Diff line change @@ -0,0 +1,192 @@ # Python development environment (with ROS!) # Install ipython  A powerful and pretty interactive shell. sudo apt-get install ipython Get started at the [official documentation](http://ipython.readthedocs.org/en/stable/interactive/tutorial.html#the-four-most-helpful-commands). # Install sublime text 3  sudo add-apt-repository ppa:webupd8team/sublime-text-3 sudo apt-get update sudo apt-get install sublime-text-installer ## To disable new version notifications: Open sublime with subl Add the following to your User Preferences file (Preferences > Settings - User): "update_check": false ## To comment blocks of code Shortcuts by default are for english keyboard, for spanish keyboard you probably want Control+7/Control+shift+7 to work on comment blocks of code. Add the following to your User Preferences file (Preferences > Key bindings - User): { "keys": ["ctrl+7"], "command": "toggle_comment", "args": { "block": false } }, { "keys": ["ctrl+shift+7"], "command": "toggle_comment", "args": { "block": true } }, In order to change any key binding you can check what is the default (Preferences > Key bindings - Default) and just copy in the user prefences file with the modified keys. To know which key combination you are pressing you can go to "View->Console" and type sublime.log_input(True) ## Translate tabs to spaces by default You can always change it from the bottom right menu for any file, but by default we would to always use spaces when using ROS files. Add the following to your User Preferences file (Preferences > Settings - User): "translate_tabs_to_spaces": false, ## Install Anaconda Python IDE  [Anaconda](http://damnwidget.github.io/anaconda/) sublime text plugin, not to be confused with [Anaconda from Continuum analytics](https://www.continuum.io/why-anaconda), is a plugin that turns your SublimeText 3 into a rich featured Python development stack that boost your productivity and helps you to ensure the quality and style of your code. To install it follow the [installation instructions](http://damnwidget.github.io/anaconda/#using-anaconda-installation), resumed here as: ### Install Package Control Go to View > Show Console and paste: ```` import urllib.request,os,hashlib; h = '2915d1851351e5ee549c20394736b442' + '8bc59f460fa1548d1514676163dafc88'; pf = 'Package Control.sublime-package'; ipp = sublime.installed_packages_path(); urllib.request.install_opener( urllib.request.build_opener( urllib.request.ProxyHandler()) ); by = urllib.request.urlopen( 'http://packagecontrol.io/' + pf.replace(' ', '%20')).read(); dh = hashlib.sha256(by).hexdigest(); print('Error validating download (got %s instead of %s), please try manual install' % (dh, h)) if dh != h else open(os.path.join( ipp, pf), 'wb' ).write(by) ```` ### Install Anaconda plugin trough package control Go to Tools > Command Palette (or Control+Shift+P) and write `install package` then write `anaconda` in the input window popup window and press enter. After restarting SublimeText it will be able to auto complete (on tab, on dot), show documentation (control+alt+d), go to the declaration of stuff (control+alt+g), autoformat (control+alt+r), find usages (control+alt+f). The shortcut keys can be changed by going to Preferences > Package Settings > Anaconda > Key bindings, use the default to know what you can change and write it in the user one like we did with the keybindings before. If you want a behaviour similar to QtCreator or Eclipse on going to declaration by Control+Click, you can do: ```bash echo '[ { "button": "button1", "count": 1, "modifiers": ["ctrl", "alt"], "press_command": "drag_select", "command": "anaconda_goto" } ]' > ~/.config/sublime-text-3/Packages/User/Default\ \(Linux\).sublime-mousemap ``` Which will enable Control+Alt+click to go to the declaration. (Control+Click gives you multiple cursors in SublimeText). You'll get also linting for the code and other goodies, check all it can do at the documentation page. Note that you must open it from the shell with a sourced environment (source myworkspace/devel/setup.bash) to get autocompletion and such. ### Ignore a PEP8 on a single line If you ever want to ignore the PEP8 on a line just add at the end of it: '` # NOQA`' note that there are two spaces before the `#` and one after. Useful for comment lines with big URL's for example. ## Bonuses of Sublime Text You can not only use Sublime Text for dealing with Python code, but also... ### Open launch files with highlighting Just open a .launch file and click on the bottom right of the window corner (it says the current highlighting provided) and click on "Open all current extension as..." and choose XML. ### Edit and Preview MarkDown files Control+Shift+P write `install` and write markdown, choose MarkdownEditing. Control+Shift+P write `install` and write markdown, choose MarkDown Preview. Choose (bottom right corner) MarkdownEditing > Markdown / Markdown GFM from the file syntax to use it. To ease preview in browser add to Preferences > Key bindings - User: { "keys": ["alt+m"], "command": "markdown_preview", "args": {"target": "browser", "parser":"markdown"} }, To preview doing alt+m. # Install PyCharm  Even tho SublimeText is great, it may lack some maturity that PyCharm may have. For example, it helps you auto-fill documentation strings, convert methods to properties, hints that you can convert something to a static method, hints you to specify return type... etc. The downside is a slower starting time and a Eclipse-like feeling (if that is a downside for you). ## Install java8 PyCharm is like a heavily modified Eclipse, so it's based in Java. sudo add-apt-repository ppa:webupd8team/java sudo apt-get update sudo apt-get install oracle-java8-installer ## Actually install PyCharm (Community edition) I find it easier to install it from a repository: wget -q -O - http://archive.getdeb.net/getdeb-archive.key | sudo apt-key add - sudo sh -c 'echo "deb http://archive.getdeb.net/ubuntu trusty-getdeb apps" >> /etc/apt/sources.list.d/getdeb.list' sudo apt-get update sudo apt-get install pycharm You can now just type pycharm to open it. **Note that you must open it from the shell with a sourced environment (source myworkspace/devel/setup.bash) to get autocompletion and such.** I choose the Darcula IDE theme (it's darker) usually, up to the user. ## Editor to have the same color theme as the app itself Go to File > Settings > Editor > Colors & Fonts and choose your Scheme (Darcula for me). Hit Apply. # ROS package with python As you may know ROS packages can contain Python code. It is structured in the following manner: ## scripts In the `scripts` folder, as the name implies, you'll place the scripts you create. Either the final executable of some awesome library you created or just plain self contained scripts. **You cannot import from somewhere else these files.** In order to install these scripts (so they are deployed) you need to add to `CMakeLists.txt` these executables like: # Install scripts install(PROGRAMS scripts/my_awesome_script.py DESTINATION ${CATKIN_PACKAGE_BIN_DESTINATION} ) ## nodes Some ROS wiki page recommends to put nodes in a `nodes` folder, everything in scripts would apply to this folder too. ## src In order to let other packages import your python libraries in ROS you must follow a few steps that have to do with the `src` folder. They are annoying the first time, but they are always the same. You have to create `your_package/src/your_package` folder. Inside of it you must create an empty `__init__.py` file. This is the way Python knows there are Python files for importing. In order to install (and be able to import) this code you must create a `setup.py` file at the root of your package `your_package/setup.py` that contains where this python code is, like: ````python #!/usr/bin/env python ## ! DO NOT MANUALLY INVOKE THIS setup.py, USE CATKIN INSTEAD from distutils.core import setup from catkin_pkg.python_setup import generate_distutils_setup setup_args = generate_distutils_setup( packages=['your_package'], package_dir={'': 'src'} ) setup(**setup_args) ```` And you must add to your `CMakeLists.txt` just after `catkin_package()`: catkin_python_setup() **DON'T CALL YOUR LIBRARY NAME EXACTLY LIKE YOUR PACKAGE OR IT WON'T BE ABLE TO BE IMPORTED** For some unknown (to me) reason you cannot have `your_package/src/your_package/your_package.py`. If any other package tries to do from your_package.your_package import SOMETHING It will fail with: ImportError: No module named your_package.your_package