-
Star
(129)
You must be signed in to star a gist -
Fork
(14)
You must be signed in to fork a gist
-
-
Save ctsrc/a1f57933a2cde9abc0f07be12889f97f to your computer and use it in GitHub Desktop.
Revisions
-
ctsrc revised this gist
Aug 3, 2022 . 1 changed file with 1 addition and 1 deletion.There are no files selected for viewing
This file contains hidden or bidirectional Unicode text that may be interpreted or compiled differently than what appears below. To review, open the file in an editor that reveals hidden Unicode characters. Learn more about bidirectional Unicode charactersOriginal file line number Diff line number Diff line change @@ -79,7 +79,7 @@ This guide was adapted from https://gist.github.com/niw/e4313b9c14e968764a52375d qemu-img resize -f raw FreeBSD-13.1-RELEASE-arm64-aarch64.raw +30G ``` By performing this resize *before* you boot the VM for the first time, FreeBSD will automatically adjust the partition size during first boot. 8. Run your FreeBSD 13.1-RELEASE for ARM64 VM -
Aug 3, 2022 . 1 changed file with 12 additions and 2 deletions.There are no files selected for viewing
This file contains hidden or bidirectional Unicode text that may be interpreted or compiled differently than what appears below. To review, open the file in an editor that reveals hidden Unicode characters. Learn more about bidirectional Unicode charactersOriginal file line number Diff line number Diff line change @@ -71,10 +71,20 @@ This guide was adapted from https://gist.github.com/niw/e4313b9c14e968764a52375d unxz -k FreeBSD-13.1-RELEASE-arm64-aarch64.raw.xz ``` 7. Grow the disk image After you've decompressed the disk image, it'll be about 5 GiB in size. Depending on what you plan to do the amount of available space may be a bit on the low side. Let's grow the disk image by another 30 GiB. ``` qemu-img resize -f raw FreeBSD-13.1-RELEASE-arm64-aarch64.raw +30G ``` By performing this resize *before* you boot the VM for the first time, FreeBSD will automatically adjust the partition size. 8. Run your FreeBSD 13.1-RELEASE for ARM64 VM ``` qemu-system-aarch64 \ -M virt \ -accel hvf \ -cpu host \ -
Aug 3, 2022 . 1 changed file with 1 addition and 1 deletion.There are no files selected for viewing
This file contains hidden or bidirectional Unicode text that may be interpreted or compiled differently than what appears below. To review, open the file in an editor that reveals hidden Unicode characters. Learn more about bidirectional Unicode charactersOriginal file line number Diff line number Diff line change @@ -1,4 +1,4 @@ # Guide: Run FreeBSD 13.1-RELEASE for ARM64 in QEMU on Apple Silicon Mac (MacBook Pro M1, etc) with HVF acceleration (Hypervisor.framework) 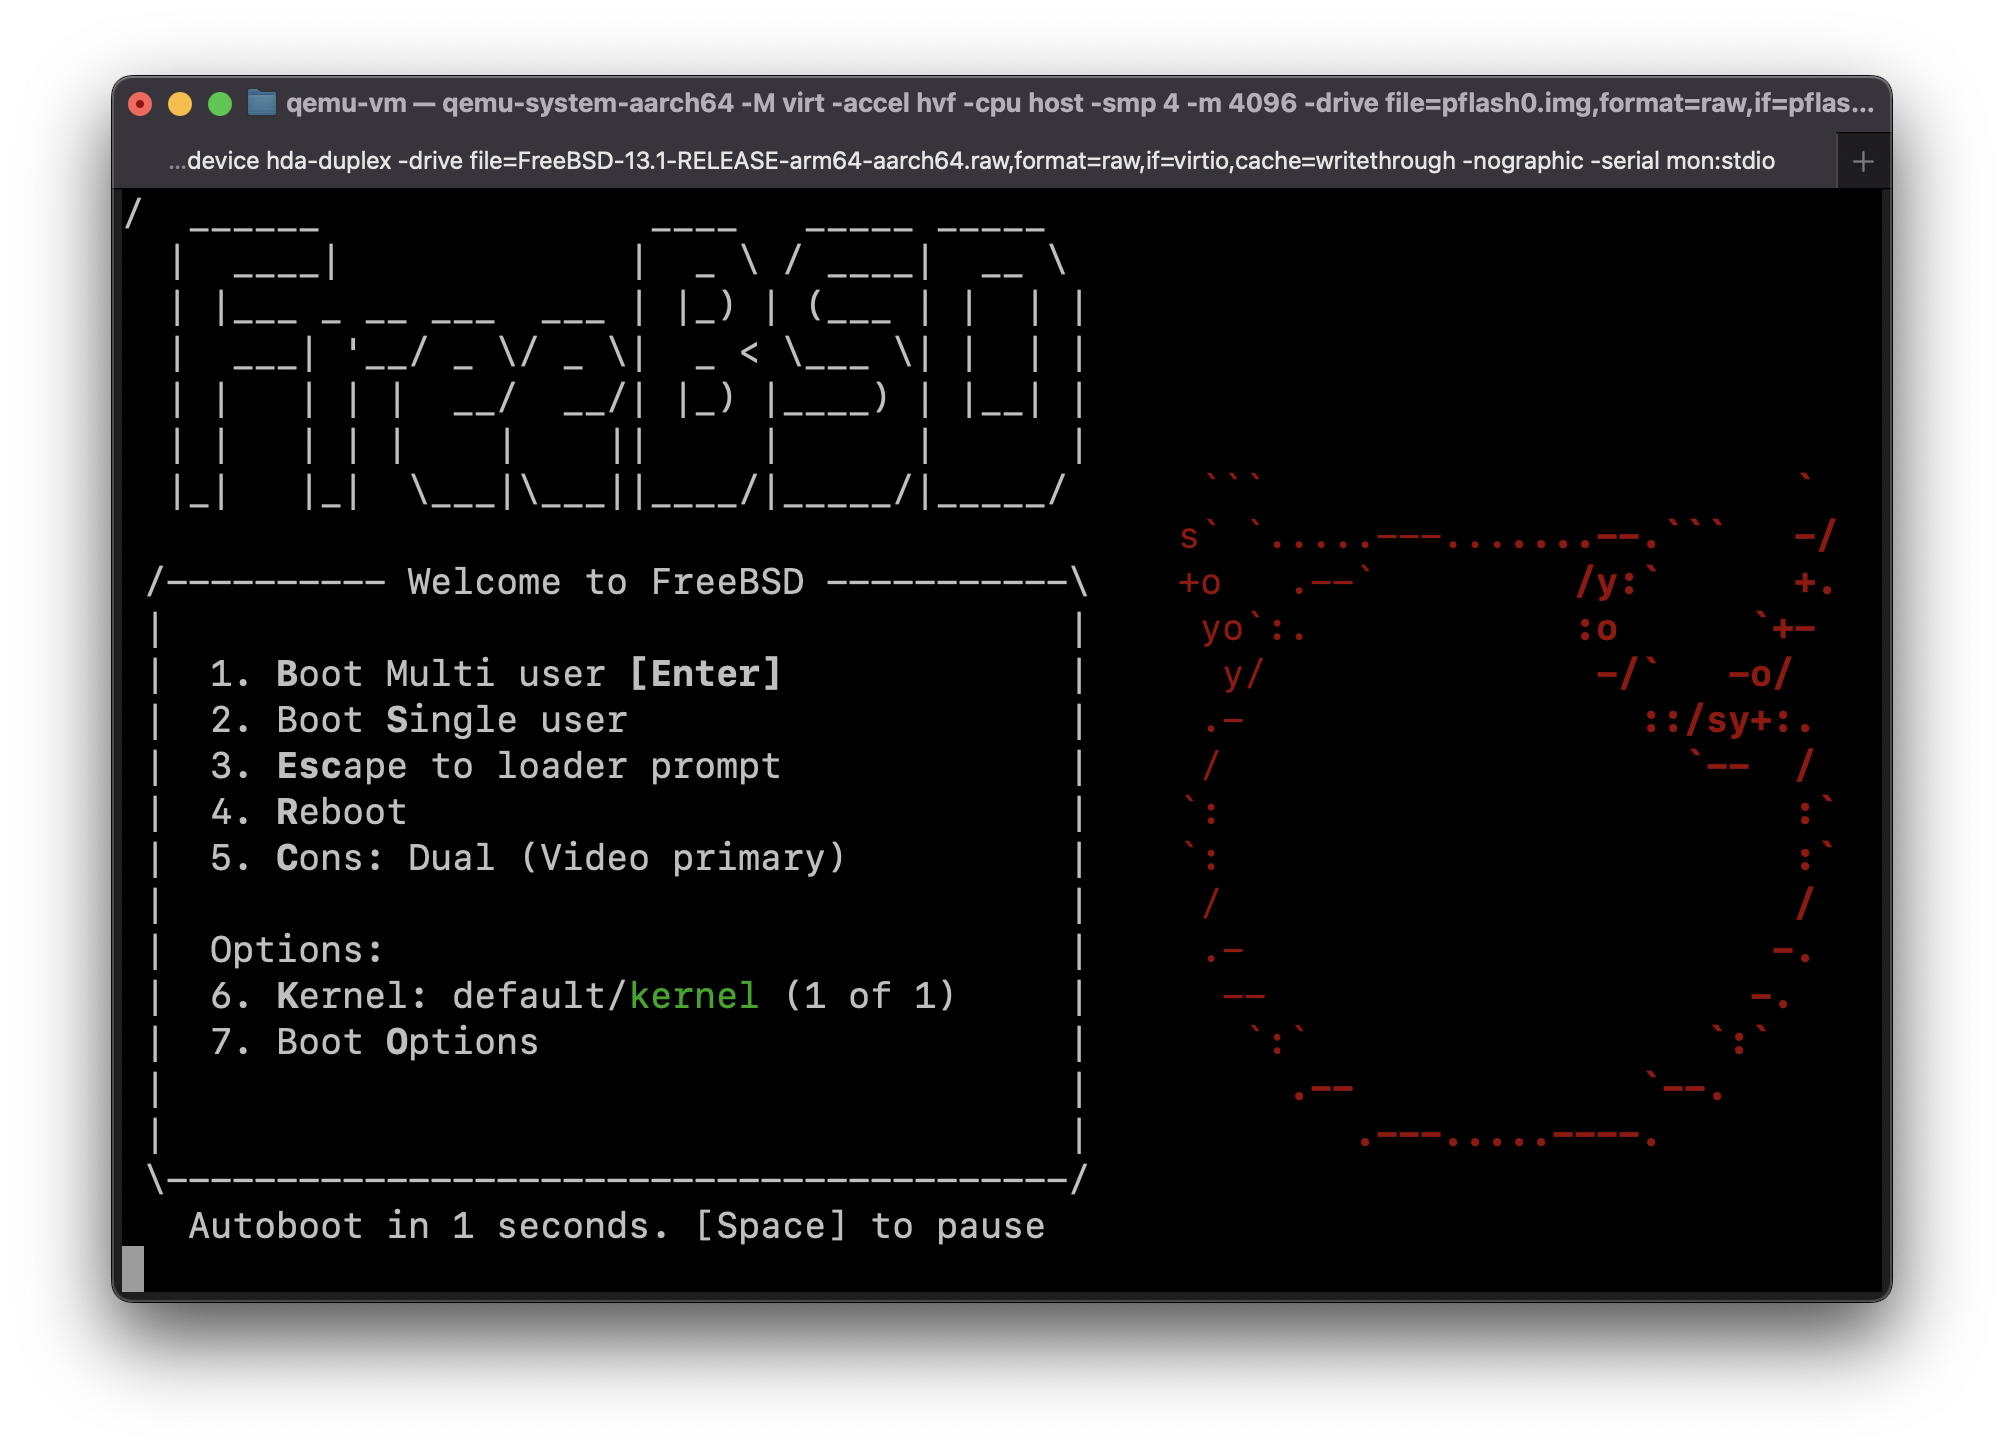 -
Aug 3, 2022 . 1 changed file with 1 addition and 1 deletion.There are no files selected for viewing
This file contains hidden or bidirectional Unicode text that may be interpreted or compiled differently than what appears below. To review, open the file in an editor that reveals hidden Unicode characters. Learn more about bidirectional Unicode charactersOriginal file line number Diff line number Diff line change @@ -1,4 +1,4 @@ # Guide: Run FreeBSD 13.1-RELEASE for ARM64 in QEMU on Apple Silicon Mac (MacBook Pro M1, etc)  -
Aug 3, 2022 . 1 changed file with 14 additions and 1 deletion.There are no files selected for viewing
This file contains hidden or bidirectional Unicode text that may be interpreted or compiled differently than what appears below. To review, open the file in an editor that reveals hidden Unicode characters. Learn more about bidirectional Unicode charactersOriginal file line number Diff line number Diff line change @@ -16,9 +16,22 @@ This guide was adapted from https://gist.github.com/niw/e4313b9c14e968764a52375d https://brew.sh/ ```zsh brew install qemu ``` ```zsh rehash ``` ```zsh qemu-system-aarch64 --version ``` ```text QEMU emulator version 7.0.0 Copyright (c) 2003-2022 Fabrice Bellard and the QEMU Project developers ``` 3. Download pre-build EDK II OVMF EFI image for QEMU. -
Aug 3, 2022 . 1 changed file with 2 additions and 2 deletions.There are no files selected for viewing
This file contains hidden or bidirectional Unicode text that may be interpreted or compiled differently than what appears below. To review, open the file in an editor that reveals hidden Unicode characters. Learn more about bidirectional Unicode charactersOriginal file line number Diff line number Diff line change @@ -90,7 +90,7 @@ This guide was adapted from https://gist.github.com/niw/e4313b9c14e968764a52375d (Installed via Homebrew.) **Events per second: 25,445,903.16** or ~25.4 Mio events/sec ```zsh sysbench cpu --threads=2 run @@ -133,7 +133,7 @@ Threads fairness: (Installed via FreeBSD ports.) **Events per second: 15,467,914.47** or ~15.5 Mio events/sec ```csh sysbench cpu --threads=2 run -
Aug 3, 2022 . 1 changed file with 88 additions and 0 deletions.There are no files selected for viewing
This file contains hidden or bidirectional Unicode text that may be interpreted or compiled differently than what appears below. To review, open the file in an editor that reveals hidden Unicode characters. Learn more about bidirectional Unicode charactersOriginal file line number Diff line number Diff line change @@ -83,3 +83,91 @@ This guide was adapted from https://gist.github.com/niw/e4313b9c14e968764a52375d 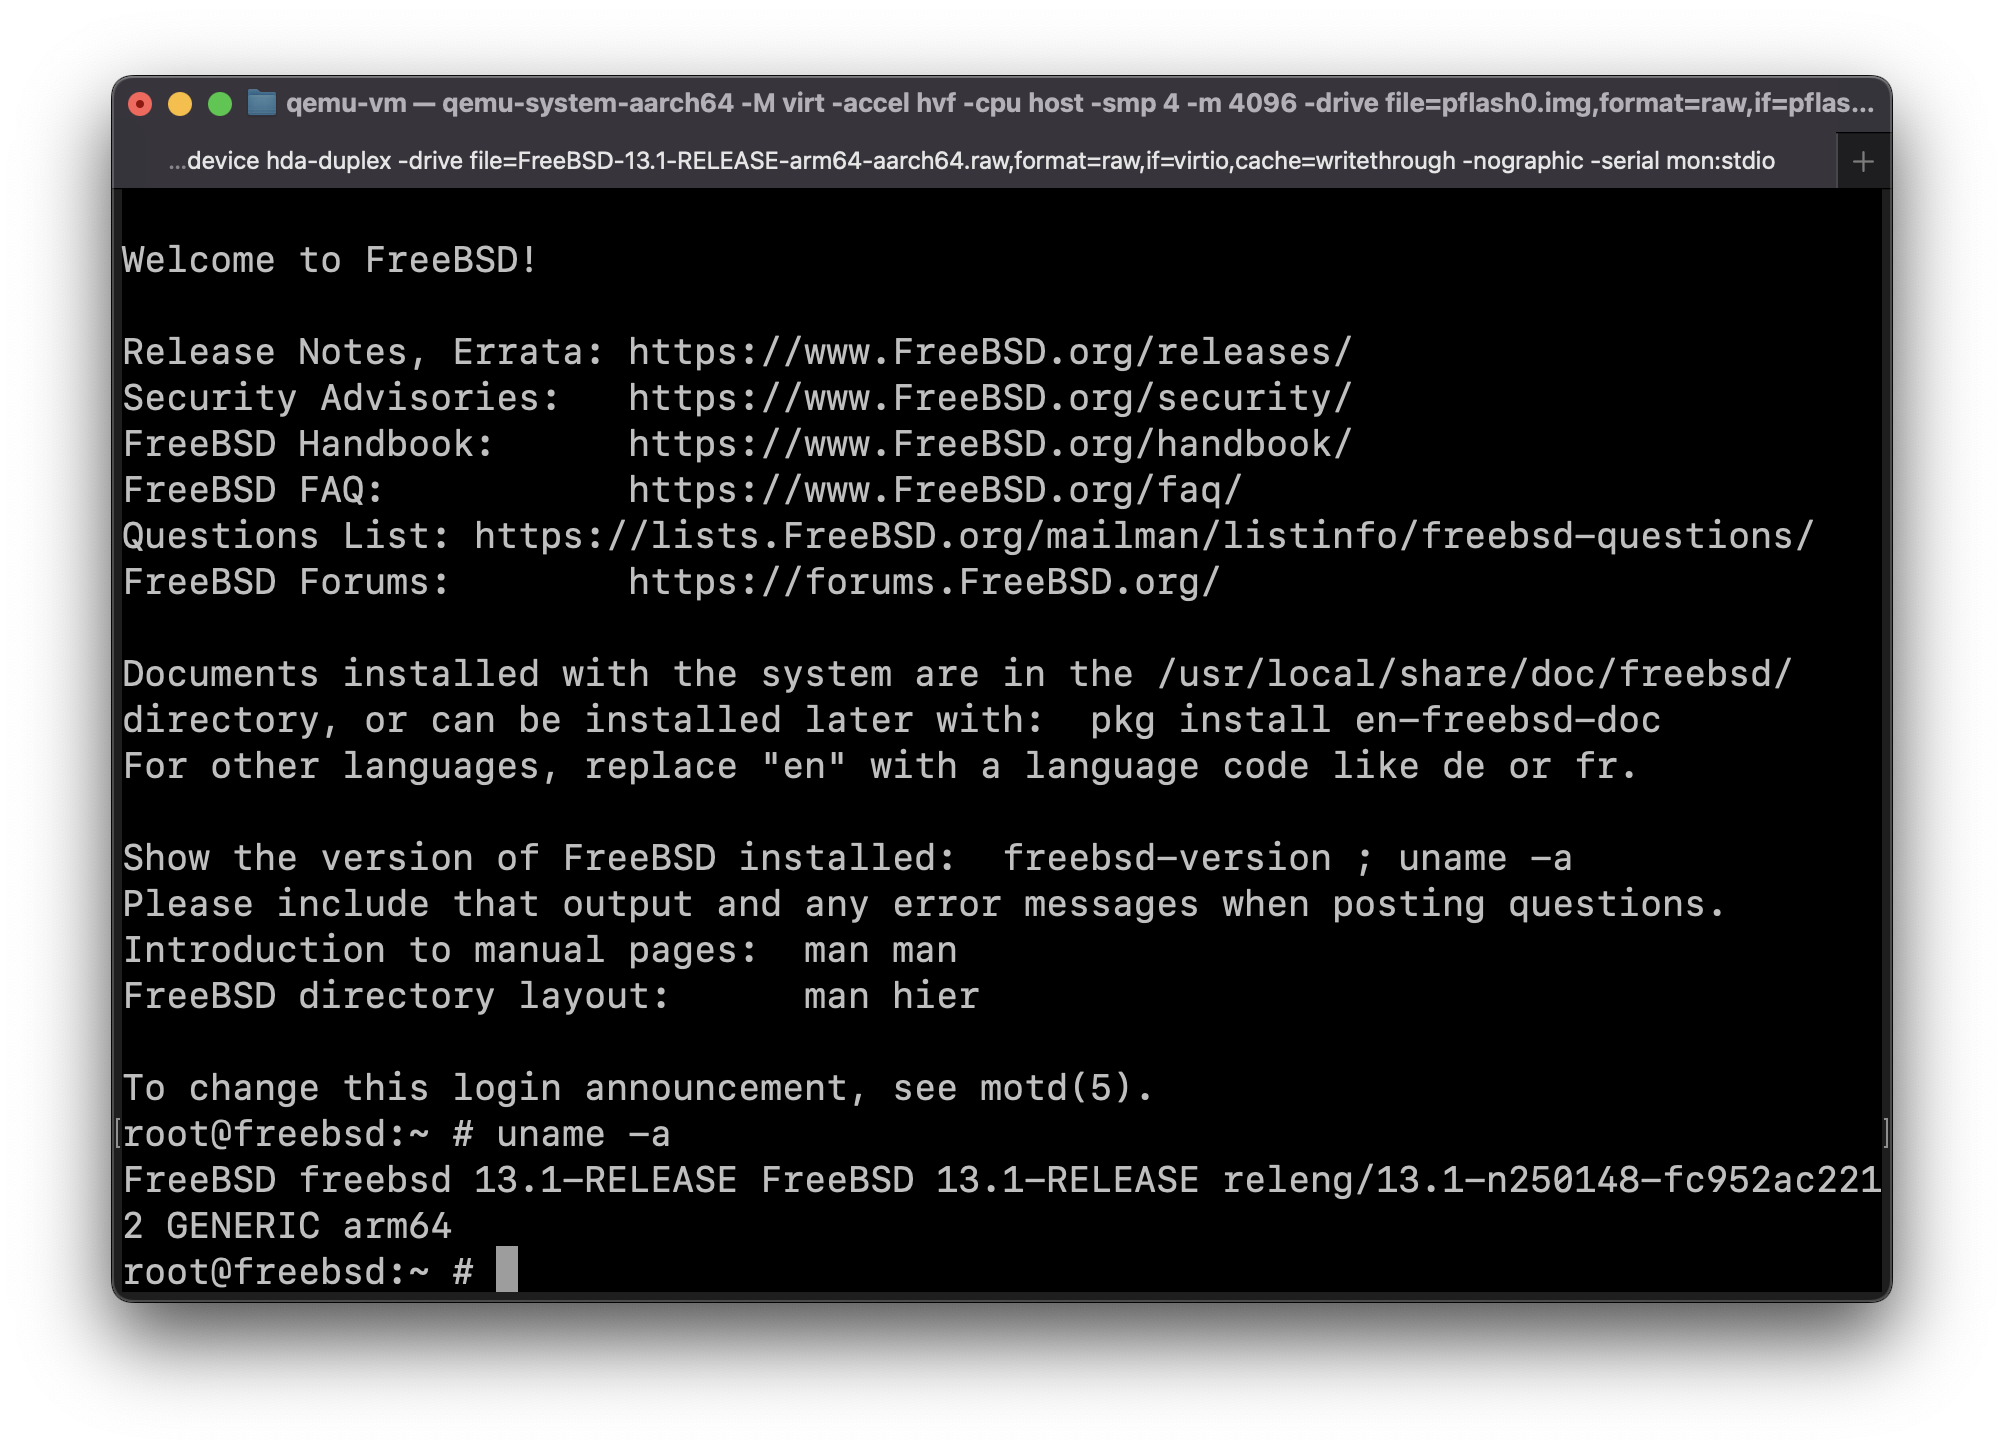  ## `sysbench` CPU benchmark comparison ### Running natively in macOS Monterey Version 12.5 (21G72) on MacBook Pro (13-inch, M1, 2020) (Installed via Homebrew.) **Events per second: 25445903.16** ```zsh sysbench cpu --threads=2 run ``` ```text sysbench 1.0.20 (using system LuaJIT 2.1.0-beta3) Running the test with following options: Number of threads: 2 Initializing random number generator from current time Prime numbers limit: 10000 Initializing worker threads... Threads started! CPU speed: events per second: 25445903.16 General statistics: total time: 10.0000s total number of events: 254468472 Latency (ms): min: 0.00 avg: 0.00 max: 0.12 95th percentile: 0.00 sum: 8916.15 Threads fairness: events (avg/stddev): 127234236.0000/15768.00 execution time (avg/stddev): 4.4581/0.00 ``` ### Running in FreeBSD 13.1-RELEASE for ARM64 in QEMU on MacBook Pro (13-inch, M1, 2020) (Installed via FreeBSD ports.) **Events per second: 15467914.47** or ~15.4 Mio events/sec ```csh sysbench cpu --threads=2 run ``` ```text sysbench 1.0.20 (using system LuaJIT 2.1.0-beta3) Running the test with following options: Number of threads: 2 Initializing random number generator from current time Prime numbers limit: 10000 Initializing worker threads... Threads started! CPU speed: events per second: 15467914.47 General statistics: total time: 10.0003s total number of events: 154689213 Latency (ms): min: 0.00 avg: 0.00 max: 0.21 95th percentile: 0.00 sum: 5684.03 Threads fairness: events (avg/stddev): 77344606.5000/169564.50 execution time (avg/stddev): 2.8420/0.00 ``` -
Aug 3, 2022 . 1 changed file with 3 additions and 3 deletions.There are no files selected for viewing
This file contains hidden or bidirectional Unicode text that may be interpreted or compiled differently than what appears below. To review, open the file in an editor that reveals hidden Unicode characters. Learn more about bidirectional Unicode charactersOriginal file line number Diff line number Diff line change @@ -1,6 +1,6 @@ # How to run FreeBSD 13.1-RELEASE for ARM64 in QEMU on Apple Silicon Mac (MacBook Pro M1, etc)  This guide was adapted from https://gist.github.com/niw/e4313b9c14e968764a52375da41b4278#running-ubuntu-server-for-arm64 @@ -81,5 +81,5 @@ This guide was adapted from https://gist.github.com/niw/e4313b9c14e968764a52375d -serial mon:stdio ```   -
Aug 3, 2022 . No changes.There are no files selected for viewing
-
Aug 3, 2022 . 1 changed file with 3 additions and 3 deletions.There are no files selected for viewing
This file contains hidden or bidirectional Unicode text that may be interpreted or compiled differently than what appears below. To review, open the file in an editor that reveals hidden Unicode characters. Learn more about bidirectional Unicode charactersOriginal file line number Diff line number Diff line change @@ -1,6 +1,6 @@ # How to run FreeBSD 13.1-RELEASE for ARM64 in QEMU on Apple Silicon Mac (MacBook Pro M1, etc)  This guide was adapted from https://gist.github.com/niw/e4313b9c14e968764a52375da41b4278#running-ubuntu-server-for-arm64 @@ -81,5 +81,5 @@ This guide was adapted from https://gist.github.com/niw/e4313b9c14e968764a52375d -serial mon:stdio ```   -
Aug 3, 2022 . 1 changed file with 17 additions and 43 deletions.There are no files selected for viewing
This file contains hidden or bidirectional Unicode text that may be interpreted or compiled differently than what appears below. To review, open the file in an editor that reveals hidden Unicode characters. Learn more about bidirectional Unicode charactersOriginal file line number Diff line number Diff line change @@ -1,60 +1,34 @@ # How to run FreeBSD 13.1-RELEASE for ARM64 in QEMU on Apple Silicon Mac (MacBook Pro M1, etc)  This guide was adapted from https://gist.github.com/niw/e4313b9c14e968764a52375da41b4278#running-ubuntu-server-for-arm64 ## Running FreeBSD 13.1-RELEASE for ARM64 1. Install Xcode from App Store or install Command Line Tools on your Mac running on Apple Silicon. ``` xcode-select --install ``` 2. Install Homebrew and QEMU. https://brew.sh/ ``` brew install qemu ``` 3. Download pre-build EDK II OVMF EFI image for QEMU. This EFI image is built from `stable202011` tag with additional resolutions in `QemuRamfb.c`. https://gist.github.com/niw/4f1f9bb572f40d406866f23b3127919b/raw/f546faea68f4149c06cca88fa67ace07a3758268/QEMU_EFI-cb438b9-edk2-stable202011-with-extra-resolutions.tar.gz To build it from the source code for adding more resolutions, see the following section. 4. Prepare pflash for non-volatile variable store, such as screen resolution. ``` mkdir ~/qemu-vm/ @@ -69,26 +43,26 @@ This guide was adapted from https://gist.github.com/niw/e4313b9c14e968764a52375d - This step is optional, you can use `-bios QEMU_EFI.fd` instead of `-drive ...if=pflash` lines in the next step, but in that case, any changes in EFI will not be persistent. 5. Download FreeBSD 13.1-RELEASE for ARM64 raw VM image xz-compressed file https://ftp2.uk.freebsd.org/pub/FreeBSD/releases/VM-IMAGES/13.1-RELEASE/aarch64/Latest/FreeBSD-13.1-RELEASE-arm64-aarch64.raw.xz (See https://docs.freebsd.org/en/books/handbook/mirrors/ for a list of mirrors to choose from.) 6. Decompress xz-compressed file, keeping a copy of the original compressed file Keeping a copy of the original file is convenient because then you can use it if you want to create additional VMs later. Just be careful not to overwrite the image of your first VM when you want to make a second VM though :P ``` mv ~/Downloads/FreeBSD-13.1-RELEASE-arm64-aarch64.raw.xz . unxz -k FreeBSD-13.1-RELEASE-arm64-aarch64.raw.xz ``` 7. Run your FreeBSD 13.1-RELEASE for ARM64 VM ``` ~/src/qemu/build/qemu-system-aarch64 \ -M virt \ -accel hvf \ -cpu host \ -smp 4 \ @@ -102,10 +76,10 @@ This guide was adapted from https://gist.github.com/niw/e4313b9c14e968764a52375d -device usb-tablet \ -device intel-hda \ -device hda-duplex \ -drive file=FreeBSD-13.1-RELEASE-arm64-aarch64.raw,format=raw,if=virtio,cache=writethrough \ -nographic \ -serial mon:stdio ```  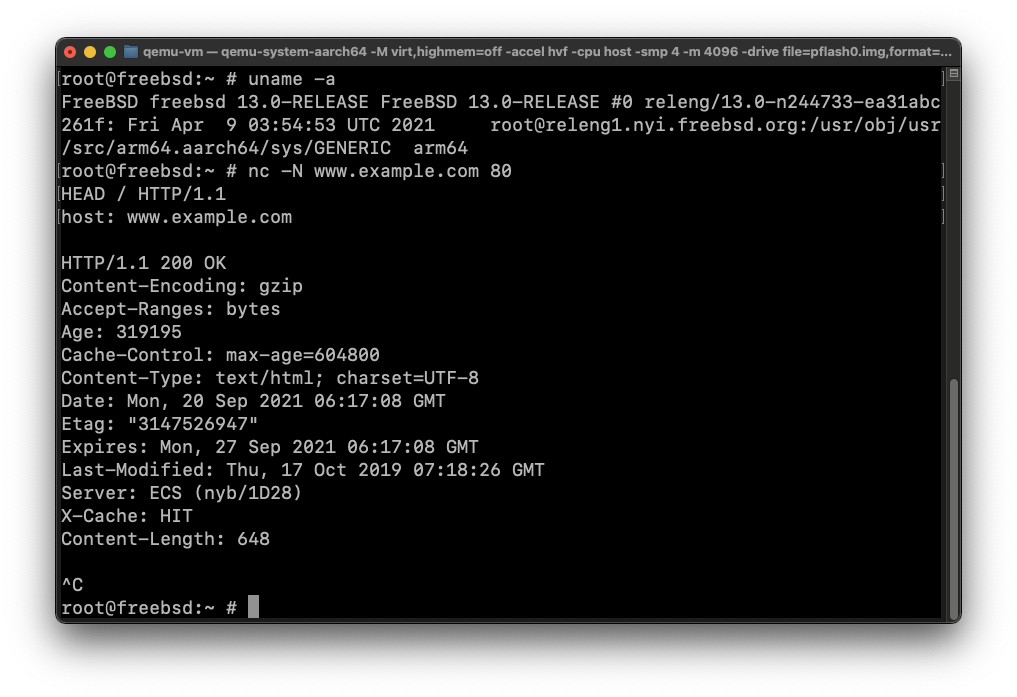 -
Sep 20, 2021 . 1 changed file with 3 additions and 3 deletions.There are no files selected for viewing
This file contains hidden or bidirectional Unicode text that may be interpreted or compiled differently than what appears below. To review, open the file in an editor that reveals hidden Unicode characters. Learn more about bidirectional Unicode charactersOriginal file line number Diff line number Diff line change @@ -1,6 +1,6 @@ # How to run FreeBSD 13.0-RELEASE for ARM64 in QEMU on Apple Silicon Mac (MacBook Pro M1, etc)  This guide was adapted from https://gist.github.com/niw/e4313b9c14e968764a52375da41b4278#running-ubuntu-server-for-arm64 @@ -107,5 +107,5 @@ This guide was adapted from https://gist.github.com/niw/e4313b9c14e968764a52375d -serial mon:stdio ```   -
Sep 20, 2021 . 1 changed file with 13 additions and 11 deletions.There are no files selected for viewing
This file contains hidden or bidirectional Unicode text that may be interpreted or compiled differently than what appears below. To review, open the file in an editor that reveals hidden Unicode characters. Learn more about bidirectional Unicode charactersOriginal file line number Diff line number Diff line change @@ -1,10 +1,10 @@ # How to run FreeBSD 13.0-RELEASE for ARM64 in QEMU on Apple Silicon Mac (MacBook Pro M1, etc)  This guide was adapted from https://gist.github.com/niw/e4313b9c14e968764a52375da41b4278#running-ubuntu-server-for-arm64 ## Running FreeBSD 13.0-RELEASE for ARM64 1. Install Xcode from App Store or install Command Line Tools on your Mac running on Apple Silicon. @@ -32,10 +32,10 @@ This guide was adapted from https://gist.github.com/niw/e4313b9c14e968764a52375d ``` cd qemu git checkout patchew/20210916155404.86958[email protected] ``` See https://patchew.org/QEMU/20210916155404.86958[email protected]/ for details. 5. Build QEMU @@ -69,26 +69,28 @@ This guide was adapted from https://gist.github.com/niw/e4313b9c14e968764a52375d - This step is optional, you can use `-bios QEMU_EFI.fd` instead of `-drive ...if=pflash` lines in the next step, but in that case, any changes in EFI will not be persistent. 8. Download FreeBSD 13.0-RELEASE for ARM64 raw VM image xz-compressed file http://ftp4.se.freebsd.org/pub/FreeBSD/releases/VM-IMAGES/13.0-RELEASE/aarch64/Latest/FreeBSD-13.0-RELEASE-arm64-aarch64.raw.xz (See https://docs.freebsd.org/en/books/handbook/mirrors/ for a list of mirrors to choose from.) 9. Decompress xz-compressed file, keeping a copy of the original compressed file Keeping a copy of the original file is convenient because then you can use it if you want to create additional VMs later. Just be careful not to overwrite the image of your first VM when you want to make a second VM though :P ``` mv ~/Downloads/FreeBSD-13.0-RELEASE-arm64-aarch64.raw.xz . unxz -k FreeBSD-13.0-RELEASE-arm64-aarch64.raw.xz ``` 10. Run your FreeBSD 13.0-RELEASE for ARM64 VM ``` ~/src/qemu/build/qemu-system-aarch64 \ -M virt,highmem=off \ -accel hvf \ -cpu host \ -smp 4 \ -m 4096 \ -drive file=pflash0.img,format=raw,if=pflash,readonly=on \ @@ -100,7 +102,7 @@ This guide was adapted from https://gist.github.com/niw/e4313b9c14e968764a52375d -device usb-tablet \ -device intel-hda \ -device hda-duplex \ -drive file=FreeBSD-13.0-RELEASE-arm64-aarch64.raw,if=virtio,cache=writethrough \ -nographic \ -serial mon:stdio ``` -
Feb 7, 2021 . 3 changed files with 0 additions and 0 deletions.There are no files selected for viewing
Binary file not shown.Empty file.Empty file. -
Feb 7, 2021 . 3 changed files with 0 additions and 0 deletions.There are no files selected for viewing
LoadingSorry, something went wrong. Reload?Sorry, we cannot display this file.Sorry, this file is invalid so it cannot be displayed.LoadingSorry, something went wrong. Reload?Sorry, we cannot display this file.Sorry, this file is invalid so it cannot be displayed.LoadingSorry, something went wrong. Reload?Sorry, we cannot display this file.Sorry, this file is invalid so it cannot be displayed. -
Feb 7, 2021 . 1 changed file with 0 additions and 1 deletion.There are no files selected for viewing
This file contains hidden or bidirectional Unicode text that may be interpreted or compiled differently than what appears below. To review, open the file in an editor that reveals hidden Unicode characters. Learn more about bidirectional Unicode charactersOriginal file line number Diff line number Diff line change @@ -106,5 +106,4 @@ This guide was adapted from https://gist.github.com/niw/e4313b9c14e968764a52375d ```   -
Feb 7, 2021 . 1 changed file with 3 additions and 3 deletions.There are no files selected for viewing
This file contains hidden or bidirectional Unicode text that may be interpreted or compiled differently than what appears below. To review, open the file in an editor that reveals hidden Unicode characters. Learn more about bidirectional Unicode charactersOriginal file line number Diff line number Diff line change @@ -1,6 +1,6 @@ # How to run FreeBSD 13.0-BETA1 for ARM64 in QEMU on Apple Silicon Mac (MacBook Pro M1, etc)  This guide was adapted from https://gist.github.com/niw/e4313b9c14e968764a52375da41b4278#running-ubuntu-server-for-arm64 @@ -105,6 +105,6 @@ This guide was adapted from https://gist.github.com/niw/e4313b9c14e968764a52375d -serial mon:stdio ```   -
Feb 7, 2021 . 1 changed file with 6 additions and 0 deletions.There are no files selected for viewing
This file contains hidden or bidirectional Unicode text that may be interpreted or compiled differently than what appears below. To review, open the file in an editor that reveals hidden Unicode characters. Learn more about bidirectional Unicode charactersOriginal file line number Diff line number Diff line change @@ -1,5 +1,7 @@ # How to run FreeBSD 13.0-BETA1 for ARM64 in QEMU on Apple Silicon Mac (MacBook Pro M1, etc)  This guide was adapted from https://gist.github.com/niw/e4313b9c14e968764a52375da41b4278#running-ubuntu-server-for-arm64 ## Running FreeBSD 13.0-BETA1 for ARM64 @@ -102,3 +104,7 @@ This guide was adapted from https://gist.github.com/niw/e4313b9c14e968764a52375d -nographic \ -serial mon:stdio ```   -
Feb 7, 2021 . 5 changed files with 33 additions and 394 deletions.There are no files selected for viewing
This file contains hidden or bidirectional Unicode text that may be interpreted or compiled differently than what appears below. To review, open the file in an editor that reveals hidden Unicode characters. Learn more about bidirectional Unicode charactersOriginal file line number Diff line number Diff line change @@ -1,230 +0,0 @@ This file contains hidden or bidirectional Unicode text that may be interpreted or compiled differently than what appears below. To review, open the file in an editor that reveals hidden Unicode characters. Learn more about bidirectional Unicode charactersOriginal file line number Diff line number Diff line change @@ -1,47 +1,45 @@ # How to run FreeBSD 13.0-BETA1 for ARM64 in QEMU on Apple Silicon Mac (MacBook Pro M1, etc) This guide was adapted from https://gist.github.com/niw/e4313b9c14e968764a52375da41b4278#running-ubuntu-server-for-arm64 ## Running FreeBSD 13.0-BETA1 for ARM64 1. Install Xcode from App Store or install Command Line Tools on your Mac running on Apple Silicon. ``` xcode-select --install ``` 2. Install Homebrew and QEMU dependencies. https://brew.sh/ ``` brew install ninja pkgconfig glib pixman libusb libssh zstd usbredir ``` 3. Clone QEMU source code with patches applied by patchew. ``` mkdir -p ~/src/ cd ~/src/ git clone https://github.com/patchew-project/qemu.git ``` 4. Checkout tag that has Hypervisor.framework patches ``` cd qemu git checkout patchew/[email protected] ``` See https://patchew.org/QEMU/[email protected]/ for details. 5. Build QEMU ``` mkdir build/ cd build/ ../configure --target-list=aarch64-softmmu --enable-cocoa make -j ``` @@ -56,180 +54,51 @@ Enjoy! 7. Prepare pflash for non-volatile variable store, such as screen resolution. ``` mkdir ~/qemu-vm/ cd ~/qemu-vm/ tar xvf ~/Downloads/QEMU_EFI-cb438b9-edk2-stable202011-with-extra-resolutions.tar.gz dd if=/dev/zero of=pflash0.img bs=1m count=64 dd if=/dev/zero of=pflash1.img bs=1m count=64 dd if=QEMU_EFI.fd of=pflash0.img conv=notrunc dd if=QEMU_VARS.fd of=pflash1.img conv=notrunc ``` - This step is optional, you can use `-bios QEMU_EFI.fd` instead of `-drive ...if=pflash` lines in the next step, but in that case, any changes in EFI will not be persistent. 8. Download FreeBSD 13.0-BETA1 for ARM64 raw VM image xz-compressed file https://download.freebsd.org/ftp/releases/VM-IMAGES/13.0-BETA1/aarch64/Latest/FreeBSD-13.0-BETA1-arm64-aarch64.raw.xz 9. Decompress xz-compressed file, keeping a copy of the original compressed file Keeping a copy of the original file is convenient because then you can use it if you want to create additional VMs later. Just be careful not to overwrite the image of your first VM when you want to make a second VM though :P ``` mv ~/Downloads/FreeBSD-13.0-BETA1-arm64-aarch64.raw.xz . unxz -k ~/Downloads/FreeBSD-13.0-BETA1-arm64-aarch64.raw.xz ``` 10. Run your FreeBSD 13.0-BETA1 for ARM64 VM ``` ~/src/qemu/build/qemu-system-aarch64 \ -M virt,highmem=off \ -accel hvf \ -cpu cortex-a72 \ -smp 4 \ -m 4096 \ -drive file=pflash0.img,format=raw,if=pflash,readonly=on \ -drive file=pflash1.img,format=raw,if=pflash \ -device virtio-gpu-pci \ -display default,show-cursor=on \ -device qemu-xhci \ -device usb-kbd \ -device usb-tablet \ -device intel-hda \ -device hda-duplex \ -drive file=FreeBSD-13.0-BETA1-arm64-aarch64.raw,if=virtio,cache=writethrough \ -nographic \ -serial mon:stdio ``` LoadingSorry, something went wrong. Reload?Sorry, we cannot display this file.Sorry, this file is invalid so it cannot be displayed.LoadingSorry, something went wrong. Reload?Sorry, we cannot display this file.Sorry, this file is invalid so it cannot be displayed.LoadingSorry, something went wrong. Reload?Sorry, we cannot display this file.Sorry, this file is invalid so it cannot be displayed. -
niw revised this gist
Jan 17, 2021 . 2 changed files with 4 additions and 4 deletions.There are no files selected for viewing
This file contains hidden or bidirectional Unicode text that may be interpreted or compiled differently than what appears below. To review, open the file in an editor that reveals hidden Unicode characters. Learn more about bidirectional Unicode charactersOriginal file line number Diff line number Diff line change @@ -76,7 +76,7 @@ ARM 版 Windows 10 や Ubuntu を Apple Silicon な Mac で動かす簡単な方 VHDX のままだとかなりの頻度でイメージが壊れる印象があるので qcow2 に変換しておく。 ``` qemu-img convert -p -O qcow2 ~/Downloads/Windows10_InsiderPreview_Client_ARM64_en-us_21286.VHDX ~/Downloads/Windows10_InsiderPreview_Client_ARM64_en-us_21286.qcow2 ``` 10. Windows 10 を起動する @@ -98,7 +98,7 @@ ARM 版 Windows 10 や Ubuntu を Apple Silicon な Mac で動かす簡単な方 -device intel-hda \ -device hda-duplex \ -nic user,model=virtio \ -drive file=~/Downloads/Windows10_InsiderPreview_Client_ARM64_en-us_21286.qcow2,format=qcow2,if=none,id=boot,cache=writethrough \ -device nvme,drive=boot,serial=boot ``` This file contains hidden or bidirectional Unicode text that may be interpreted or compiled differently than what appears below. To review, open the file in an editor that reveals hidden Unicode characters. Learn more about bidirectional Unicode charactersOriginal file line number Diff line number Diff line change @@ -79,7 +79,7 @@ Enjoy! It seems that VHDX often gets broken while it is being used, so probably it is better to convert it to qcow2 format before using it. ``` qemu-img convert -p -O qcow2 ~/Downloads/Windows10_InsiderPreview_Client_ARM64_en-us_21286.VHDX ~/Downloads/Windows10_InsiderPreview_Client_ARM64_en-us_21286.qcow2 ``` 10. Run Windows 10 @@ -100,7 +100,7 @@ Enjoy! -device usb-tablet \ -device intel-hda \ -device hda-duplex \ -drive file=~/Downloads/Windows10_InsiderPreview_Client_ARM64_en-us_21286.qcow2,format=qcow2,if=none,id=boot,cache=writethrough \ -device nvme,drive=boot,serial=boot ``` -
Jan 17, 2021 . 2 changed files with 2 additions and 2 deletions.There are no files selected for viewing
This file contains hidden or bidirectional Unicode text that may be interpreted or compiled differently than what appears below. To review, open the file in an editor that reveals hidden Unicode characters. Learn more about bidirectional Unicode charactersOriginal file line number Diff line number Diff line change @@ -76,7 +76,7 @@ ARM 版 Windows 10 や Ubuntu を Apple Silicon な Mac で動かす簡単な方 VHDX のままだとかなりの頻度でイメージが壊れる印象があるので qcow2 に変換しておく。 ``` qemu-img convert -p -O qcow2 ~/Downloads/Windows10_InsiderPreview_Client_ARM64_en-us_21286.VHDX ~/Downloads/Windows10_InsiderPreview_Client_ARM64_en-us_20231.qcow2 ``` 10. Windows 10 を起動する This file contains hidden or bidirectional Unicode text that may be interpreted or compiled differently than what appears below. To review, open the file in an editor that reveals hidden Unicode characters. Learn more about bidirectional Unicode charactersOriginal file line number Diff line number Diff line change @@ -79,7 +79,7 @@ Enjoy! It seems that VHDX often gets broken while it is being used, so probably it is better to convert it to qcow2 format before using it. ``` qemu-img convert -p -O qcow2 ~/Downloads/Windows10_InsiderPreview_Client_ARM64_en-us_21286.VHDX ~/Downloads/Windows10_InsiderPreview_Client_ARM64_en-us_20231.qcow2 ``` 10. Run Windows 10 -
Dec 28, 2020 . 2 changed files with 2 additions and 2 deletions.There are no files selected for viewing
This file contains hidden or bidirectional Unicode text that may be interpreted or compiled differently than what appears below. To review, open the file in an editor that reveals hidden Unicode characters. Learn more about bidirectional Unicode charactersOriginal file line number Diff line number Diff line change @@ -30,7 +30,7 @@ ARM 版 Windows 10 や Ubuntu を Apple Silicon な Mac で動かす簡単な方 ``` cd qemu git checkout master -b wip/hvf curl 'https://patchwork.kernel.org/series/400619/mbox/'|git am --3way ``` 5. QEMU をビルドする This file contains hidden or bidirectional Unicode text that may be interpreted or compiled differently than what appears below. To review, open the file in an editor that reveals hidden Unicode characters. Learn more about bidirectional Unicode charactersOriginal file line number Diff line number Diff line change @@ -32,7 +32,7 @@ Enjoy! ``` cd qemu git checkout master -b wip/hvf curl 'https://patchwork.kernel.org/series/400619/mbox/'|git am --3way ``` 5. Build QEMU -
Dec 20, 2020 . 2 changed files with 10 additions and 4 deletions.There are no files selected for viewing
This file contains hidden or bidirectional Unicode text that may be interpreted or compiled differently than what appears below. To review, open the file in an editor that reveals hidden Unicode characters. Learn more about bidirectional Unicode charactersOriginal file line number Diff line number Diff line change @@ -46,9 +46,11 @@ ARM 版 Windows 10 や Ubuntu を Apple Silicon な Mac で動かす簡単な方 6. QEMU 用の EDK II OVMF EFI イメージをダウンロードする。 このイメージは `stable202011` タグに、`QemuRamfb.c` に追加の解像度を足したものです。 https://gist.github.com/niw/4f1f9bb572f40d406866f23b3127919b/raw/f546faea68f4149c06cca88fa67ace07a3758268/QEMU_EFI-cb438b9-edk2-stable202011-with-extra-resolutions.tar.gz さらに解像度を追加するなど、ソースコードからビルドする場合は以下を参照のこと。 7. pflash イメージを作って、画面サイズなどを設定する不揮発なストレージを準備する @@ -102,6 +104,7 @@ ARM 版 Windows 10 や Ubuntu を Apple Silicon な Mac で動かす簡単な方 - イメージへのパスなどは適宜修正してください。 - TianoCore のロゴが出ている時に `ESC` を押して、`Device Manager`、`OVMF Platform Configuration`、`Change Preferred Resolution for Next Boot` と進めて解像度を変更できます。 - 解像度を追加するには、下記の「EDK II の OVMF EFI イメージをビルドする」に従って `OvmfPkg/QemuRamfbDxe/QemuRamfb.c` を変更し、新しい `QEMU_EFI.fd` を作ってください。 - `-device usb-mouse` より `-device usb-tablet` を使うことでマウスカーソルがロックされなくなり使いやすくなります。 - `-device intel-hda -device hda-duplex` でオーディオが使えるようになります。 - `-nic user,model=virtio` がネットワークインターフェイスです。有効にするには以下を参照してください。 This file contains hidden or bidirectional Unicode text that may be interpreted or compiled differently than what appears below. To review, open the file in an editor that reveals hidden Unicode characters. Learn more about bidirectional Unicode charactersOriginal file line number Diff line number Diff line change @@ -48,9 +48,11 @@ Enjoy! 6. Download pre-build EDK II OVMF EFI image for QEMU. This EFI image is built from `stable202011` tag with additional resolutions in `QemuRamfb.c`. https://gist.github.com/niw/4f1f9bb572f40d406866f23b3127919b/raw/f546faea68f4149c06cca88fa67ace07a3758268/QEMU_EFI-cb438b9-edk2-stable202011-with-extra-resolutions.tar.gz To build it from the source code for adding more resolutions, see the following section. 7. Prepare pflash for non-volatile variable store, such as screen resolution. @@ -104,6 +106,7 @@ Enjoy! - Please modify each path to the image depends on your environment. - Hit `ESC` while you see TianoCore, then `Device Manager`, `OVMF Platform Configuration`, `Change Preferred Resolution for Next Boot` to change screen resolution. - To add more resolutions, follow "Build EDK II OVMF EFI image from the source code" below and modify `OvmfPkg/QemuRamfbDxe/QemuRamfb.c` then build new `QEMU_EFI.fd`. - Use `-device usb-tablet` instead of `-device usb-mouse` allows transparently moving mouse cursor. - `-device intel-hda -device hda-duplex` to enable audio. - `-nic user,model=virtio` is the network interface. To enable it, see the following section. -
Dec 20, 2020 . 2 changed files with 2 additions and 2 deletions.There are no files selected for viewing
This file contains hidden or bidirectional Unicode text that may be interpreted or compiled differently than what appears below. To review, open the file in an editor that reveals hidden Unicode characters. Learn more about bidirectional Unicode charactersOriginal file line number Diff line number Diff line change @@ -188,7 +188,7 @@ ARM 版 Windows 10 を動かす手順に従って QEMU を準備して、Ubuntu -device intel-hda \ -device hda-duplex \ -drive file=~/Downloads/ubuntu.qcow2,if=virtio,cache=writethrough \ -cdrom ~/Downloads/ubuntu-20.04.1-live-server-arm64.iso ``` - 指示に従ってインストールしたあとは `-cdrom` は不要です。 This file contains hidden or bidirectional Unicode text that may be interpreted or compiled differently than what appears below. To review, open the file in an editor that reveals hidden Unicode characters. Learn more about bidirectional Unicode charactersOriginal file line number Diff line number Diff line change @@ -192,7 +192,7 @@ Follow the same steps for Windows 10 to prepare QEMU, then download Ubuntu Serve -device intel-hda \ -device hda-duplex \ -drive file=~/Downloads/ubuntu.qcow2,if=virtio,cache=writethrough \ -cdrom ~/Downloads/ubuntu-20.04.1-live-server-arm64.iso ``` - Follow instruction to install Ubuntu Server. Once it's installed, `-cdrom` argument is not needed. -
Dec 20, 2020 . 2 changed files with 2 additions and 2 deletions.There are no files selected for viewing
This file contains hidden or bidirectional Unicode text that may be interpreted or compiled differently than what appears below. To review, open the file in an editor that reveals hidden Unicode characters. Learn more about bidirectional Unicode charactersOriginal file line number Diff line number Diff line change @@ -1,6 +1,6 @@ # ARM 版 Windows 10 や Ubuntu for ARM64 を Apple Silicon な Mac で動かす ARM 版 Windows 10 や Ubuntu を Apple Silicon な Mac で動かす簡単な方法です。 > メモ: 2020年12月19日現時点での方法で、今後おおきく改善されていくと思います(だといいな。) This file contains hidden or bidirectional Unicode text that may be interpreted or compiled differently than what appears below. To review, open the file in an editor that reveals hidden Unicode characters. Learn more about bidirectional Unicode charactersOriginal file line number Diff line number Diff line change @@ -1,6 +1,6 @@ # How to run Windows 10 on ARM or Ubuntu for ARM64 in QEMU on Apple Silicon Mac Here is easy steps to try Windows 10 on ARM or Ubuntu for ARM64 on your Apple Silicon Mac. Enjoy! > NOTE: that this is current, 12/19/2020 state. It will be improved a lot in upcoming a few months... (I hope.) -
Dec 20, 2020 . No changes.There are no files selected for viewing
-
Dec 20, 2020 . 2 changed files with 142 additions and 46 deletions.There are no files selected for viewing
This file contains hidden or bidirectional Unicode text that may be interpreted or compiled differently than what appears below. To review, open the file in an editor that reveals hidden Unicode characters. Learn more about bidirectional Unicode charactersOriginal file line number Diff line number Diff line change @@ -1,10 +1,10 @@ # ARM 版 Windows 10 や Ubuntu for ARM64 を Apple Silicon な Mac で動かす ARM 版 Windows 10 を Apple Silicon な Mac で動かす簡単な方法です。 > メモ: 2020年12月19日現時点での方法で、今後おおきく改善されていくと思います(だといいな。) ## ARM 版 Windows 10 を動かす 1. Xcode を App Store で、あるいは Command Line Tools を Apple Silicon な Mac にインストール @@ -44,25 +44,13 @@ ARM 版 Windows 10 を Apple Silicon な Mac で動かす簡単な方法です make -j ``` 6. QEMU 用の EDK II OVMF EFI イメージをダウンロードする。 https://gist.github.com/niw/4f1f9bb572f40d406866f23b3127919b/raw/f4dab9b407a2ea94ceceb7905eb918e1317bc251/QEMU_EFI-a096471-edk2-stable202011.tar.gz ソースコードからビルドする場合は以下を参照のこと。 7. pflash イメージを作って、画面サイズなどを設定する不揮発なストレージを準備する `QEMU_EFI-....tar.gz` をダウンロードしたディレクトリで以下を実行。 @@ -77,6 +65,18 @@ ARM 版 Windows 10 を Apple Silicon な Mac で動かす簡単な方法です - このステップは省略可能。その場合は次のステップで `-drive ...,if=pflash,...` のかわりに `-bios ~/Downloads/QEMU_EFI.fd` を指定すること。ただし、EFI での変更が保存されなくなります。 8. Windows 10 on ARM Insider Preview をダウンロードする https://www.microsoft.com/en-us/software-download/windowsinsiderpreviewARM64 9. VHDX から qcow2 に変換する VHDX のままだとかなりの頻度でイメージが壊れる印象があるので qcow2 に変換しておく。 ``` qemu-img convert -p -O qcow2 ~/Downloads/Windows10_InsiderPreview_Client_ARM64_en-us_20231.VHDX ~/Downloads/Windows10_InsiderPreview_Client_ARM64_en-us_20231.qcow2 ``` 10. Windows 10 を起動する ``` @@ -152,16 +152,56 @@ VirtIO NIC は標準では有効にならないので、デバイスドライバ Next をクリックして `Red Hat VertIO Ethernet Adapter` をインストール。 ## Ubuntu Server for ARM64 を動かす ARM 版 Windows 10 を動かす手順に従って QEMU を準備して、Ubuntu Server for ARM64 をダウンロードしてインストールします。 1. 上記の手順 1 から 7 までに従って QEMU を準備する。 2. 空のディスクイメージを作成する。 ``` ./qemu-img create -f qcow2 ~/Downloads/ubuntu.qcow2 40G ``` 3. Ubuntu Server for ARM64 をダウンロードする。 https://ubuntu.com/download/server/arm 4. Ubuntu Server for ARM をインストールする。 ``` ./qemu-system-aarch64 \ -monitor stdio \ -M virt,highmem=off \ -accel hvf \ -cpu cortex-a72 \ -smp 4 \ -m 4096 \ -drive file=~/Downloads/pflash0.img,format=raw,if=pflash,readonly=on \ -drive file=~/Downloads/pflash1.img,format=raw,if=pflash \ -device virtio-gpu-pci \ -display default,show-cursor=on \ -device qemu-xhci \ -device usb-kbd \ -device usb-tablet \ -device intel-hda \ -device hda-duplex \ -drive file=~/Downloads/ubuntu.qcow2,if=virtio,cache=writethrough \ -cdrom ~/Downloads/ubuntu-20.04.1-live-server-arm64.iso \ ``` - 指示に従ってインストールしたあとは `-cdrom` は不要です。 ## EDK II の OVMF EFI イメージをビルドする 上記の手順に従って Ubuntu Server for ARM64 を動かします。 1. EDK II のソースコードを取ってくる。 ``` git clone --depth 1 --branch edk2-stable202011 https://github.com/tianocore/edk2.git cd edk2 git submodule update --init --recursive ``` @@ -170,10 +210,18 @@ OVMF EFI イメージをソースコードから作る場合、とりあえず 2. ビルドする ``` sudo apt install iasl python3 python3-distutils uuid-dev make g++ source edksetup.sh make -C BaseTools build -a AARCH64 -t GCC5 -p ArmVirtPkg/ArmVirtQemu.dsc ``` `Build/ArmVirtQemu-AARCH64/DEBUG_GCC5/FV` に `QEMU_EFI.fd` と `QEMU_VARS.fd` ができるはず。 - これらのファイルを簡単に macOS ホストに取り出すには macOS でリモートアクセスを有効にして `scp` で `10.0.2.2` にコピー。 - x86_64 の環境でビルドする場合は以下のツールチェーンでクロスコンパイル。 ``` sudo apt install gcc-aarch64-linux-gnu env GCC5_AARCH64_PREFIX=aarch64-linux-gnu- build -a AARCH64 -t GCC5 -p ArmVirtPkg/ArmVirtQemu.dsc ``` This file contains hidden or bidirectional Unicode text that may be interpreted or compiled differently than what appears below. To review, open the file in an editor that reveals hidden Unicode characters. Learn more about bidirectional Unicode charactersOriginal file line number Diff line number Diff line change @@ -1,11 +1,11 @@ # How to run Windows 10 on ARM or Ubuntu for ARM64 in QEMU on Apple Silicon Mac Here is easy steps to try Windows 10 on ARM on your Apple Silicon Mac. Enjoy! > NOTE: that this is current, 12/19/2020 state. It will be improved a lot in upcoming a few months... (I hope.) ## Running Windows 10 on ARM 1. Install Xcode from App Store or install Command Line Tools on your Mac running on Apple Silicon. @@ -46,25 +46,13 @@ Enjoy! make -j ``` 6. Download pre-build EDK II OVMF EFI image for QEMU. https://gist.github.com/niw/4f1f9bb572f40d406866f23b3127919b/raw/f4dab9b407a2ea94ceceb7905eb918e1317bc251/QEMU_EFI-a096471-edk2-stable202011.tar.gz To build it from the source code, see the following section. 7. Prepare pflash for non-volatile variable store, such as screen resolution. In the directory where you downloaded `QEMU_EFI-....tar.gz`, run following commands. @@ -80,6 +68,18 @@ Enjoy! - This step is optional, you can use `-bios ~/Downloads/QEMU_EFI.fd` instead of `-drive ...if=pflash` lines in the next step, but in that case, any changes in EFI will not be persistent. 8. Download Windows 10 on ARM Insider Preview https://www.microsoft.com/en-us/software-download/windowsinsiderpreviewARM64 9. Convert VHDX downloaded Windows image to qcow2 format It seems that VHDX often gets broken while it is being used, so probably it is better to convert it to qcow2 format before using it. ``` qemu-img convert -p -O qcow2 ~/Downloads/Windows10_InsiderPreview_Client_ARM64_en-us_20231.VHDX ~/Downloads/Windows10_InsiderPreview_Client_ARM64_en-us_20231.qcow2 ``` 10. Run Windows 10 ``` @@ -156,16 +156,56 @@ device driver. Click Next to install `Red Hat VertIO Ethernet Adapter`. ## Running Ubuntu Server for ARM64 Follow the same steps for Windows 10 to prepare QEMU, then download Ubuntu Server for ARM64 and install it. 1. Follow previous steps from 1. to 7. to prepare QEMU. 2. Create an empty disk image. ``` ./qemu-img create -f qcow2 ~/Downloads/ubuntu.qcow2 40G ``` 3. Download Ubuntu Server for ARM64 https://ubuntu.com/download/server/arm 4. Install Ubuntu Server for ARM ``` ./qemu-system-aarch64 \ -monitor stdio \ -M virt,highmem=off \ -accel hvf \ -cpu cortex-a72 \ -smp 4 \ -m 4096 \ -drive file=~/Downloads/pflash0.img,format=raw,if=pflash,readonly=on \ -drive file=~/Downloads/pflash1.img,format=raw,if=pflash \ -device virtio-gpu-pci \ -display default,show-cursor=on \ -device qemu-xhci \ -device usb-kbd \ -device usb-tablet \ -device intel-hda \ -device hda-duplex \ -drive file=~/Downloads/ubuntu.qcow2,if=virtio,cache=writethrough \ -cdrom ~/Downloads/ubuntu-20.04.1-live-server-arm64.iso \ ``` - Follow instruction to install Ubuntu Server. Once it's installed, `-cdrom` argument is not needed. ## Build EDK II OVMF EFI image from the source code Follow the previous instructions to run Ubuntu Server for ARM64. 1. Checkout EDK II source code. ``` git clone --depth 1 --branch edk2-stable202011 https://github.com/tianocore/edk2.git cd edk2 git submodule update --init --recursive ``` @@ -175,10 +215,18 @@ To build this from the source code, you may need to setup Linux environment. Ins 2. Build it. ``` sudo apt install iasl python3 python3-distutils uuid-dev make g++ source edksetup.sh make -C BaseTools build -a AARCH64 -t GCC5 -p ArmVirtPkg/ArmVirtQemu.dsc ``` Then, you will get `QEMU_EFI.fd` and `QEMU_VARS.fd` in `Build/ArmVirtQemu-AARCH64/DEBUG_GCC5/FV`. - The easiest way to take these files to the host macOS, run Remove Login on macOS then `scp` these to `10.0.2.2`. - To build these on x86_64 environment, use following toolchain to cross compile. ``` sudo apt install gcc-aarch64-linux-gnu env GCC5_AARCH64_PREFIX=aarch64-linux-gnu- build -a AARCH64 -t GCC5 -p ArmVirtPkg/ArmVirtQemu.dsc ``` -
Dec 19, 2020 . 2 changed files with 2 additions and 2 deletions.There are no files selected for viewing
This file contains hidden or bidirectional Unicode text that may be interpreted or compiled differently than what appears below. To review, open the file in an editor that reveals hidden Unicode characters. Learn more about bidirectional Unicode charactersOriginal file line number Diff line number Diff line change @@ -170,7 +170,7 @@ OVMF EFI イメージをソースコードから作る場合、とりあえず 2. ビルドする ``` sudo apt install iasl python3 python3-distutils uuid-dev gcc-aarch64-linux-gnu source edksetup.sh make -C BaseTools env GCC5_AARCH64_PREFIX=aarch64-linux-gnu- build -a AARCH64 -t GCC5 -p ArmVirtPkg/ArmVirtQemu.dsc This file contains hidden or bidirectional Unicode text that may be interpreted or compiled differently than what appears below. To review, open the file in an editor that reveals hidden Unicode characters. Learn more about bidirectional Unicode charactersOriginal file line number Diff line number Diff line change @@ -175,7 +175,7 @@ To build this from the source code, you may need to setup Linux environment. Ins 2. Build it. ``` sudo apt install iasl python3 python3-distutils uuid-dev gcc-aarch64-linux-gnu source edksetup.sh make -C BaseTools env GCC5_AARCH64_PREFIX=aarch64-linux-gnu- build -a AARCH64 -t GCC5 -p ArmVirtPkg/ArmVirtQemu.dsc -
Dec 19, 2020 . 2 changed files with 5 additions and 3 deletions.There are no files selected for viewing
This file contains hidden or bidirectional Unicode text that may be interpreted or compiled differently than what appears below. To review, open the file in an editor that reveals hidden Unicode characters. Learn more about bidirectional Unicode charactersOriginal file line number Diff line number Diff line change @@ -170,7 +170,7 @@ OVMF EFI イメージをソースコードから作る場合、とりあえず 2. ビルドする ``` apt install iasl python3 python3-distutils uuid-dev gcc-aarch64-linux-gnu source edksetup.sh make -C BaseTools env GCC5_AARCH64_PREFIX=aarch64-linux-gnu- build -a AARCH64 -t GCC5 -p ArmVirtPkg/ArmVirtQemu.dsc This file contains hidden or bidirectional Unicode text that may be interpreted or compiled differently than what appears below. To review, open the file in an editor that reveals hidden Unicode characters. Learn more about bidirectional Unicode charactersOriginal file line number Diff line number Diff line change @@ -110,7 +110,9 @@ Enjoy! ## Enable the internet VirtIO NIC is not enabled by default. To make it works, you need to device driver. 1. Download VirtIO device drivers ISO from [Fedora Project](https://docs.fedoraproject.org/en-US/quick-docs/creating-windows-virtual-machines-using-virtio-drivers/index.html#virtio-win-direct-downloads). @@ -173,7 +175,7 @@ To build this from the source code, you may need to setup Linux environment. Ins 2. Build it. ``` apt install iasl python3 python3-distutils uuid-dev gcc-aarch64-linux-gnu source edksetup.sh make -C BaseTools env GCC5_AARCH64_PREFIX=aarch64-linux-gnu- build -a AARCH64 -t GCC5 -p ArmVirtPkg/ArmVirtQemu.dsc -
Dec 12, 2020 . 2 changed files with 6 additions and 6 deletions.There are no files selected for viewing
This file contains hidden or bidirectional Unicode text that may be interpreted or compiled differently than what appears below. To review, open the file in an editor that reveals hidden Unicode characters. Learn more about bidirectional Unicode charactersOriginal file line number Diff line number Diff line change @@ -2,7 +2,7 @@ ARM 版 Windows 10 を Apple Silicon な Mac で動かす簡単な方法です。 > メモ: 2020年12月12日現時点での方法で、今後おおきく改善されていくと思います(だといいな。) ## 手順 @@ -29,8 +29,8 @@ ARM 版 Windows 10 を Apple Silicon な Mac で動かす簡単な方法です ``` cd qemu git checkout master -b wip/hvf curl 'https://patchwork.kernel.org/series/400619/mbox/'|git am ``` 5. QEMU をビルドする This file contains hidden or bidirectional Unicode text that may be interpreted or compiled differently than what appears below. To review, open the file in an editor that reveals hidden Unicode characters. Learn more about bidirectional Unicode charactersOriginal file line number Diff line number Diff line change @@ -3,7 +3,7 @@ Here is easy steps to try Windows 10 on ARM on your Apple Silicon Mac. Enjoy! > NOTE: that this is current, 12/12/2020 state. It will be improved a lot in upcoming a few months... (I hope.) ## Steps @@ -31,8 +31,8 @@ Enjoy! ``` cd qemu git checkout master -b wip/hvf curl 'https://patchwork.kernel.org/series/400619/mbox/'|git am ``` 5. Build QEMU
NewerOlder