Last active
November 15, 2017 14:45
-
-
Save stilldavid/691afe17d9c694d122886c6036ff940c to your computer and use it in GitHub Desktop.
Revisions
-
stilldavid revised this gist
Nov 15, 2017 . 1 changed file with 1 addition and 1 deletion.There are no files selected for viewing
This file contains hidden or bidirectional Unicode text that may be interpreted or compiled differently than what appears below. To review, open the file in an editor that reveals hidden Unicode characters. Learn more about bidirectional Unicode charactersOriginal file line number Diff line number Diff line change @@ -38,7 +38,7 @@ The circuit, which is put together on the breadboard with jumper wires, looks li 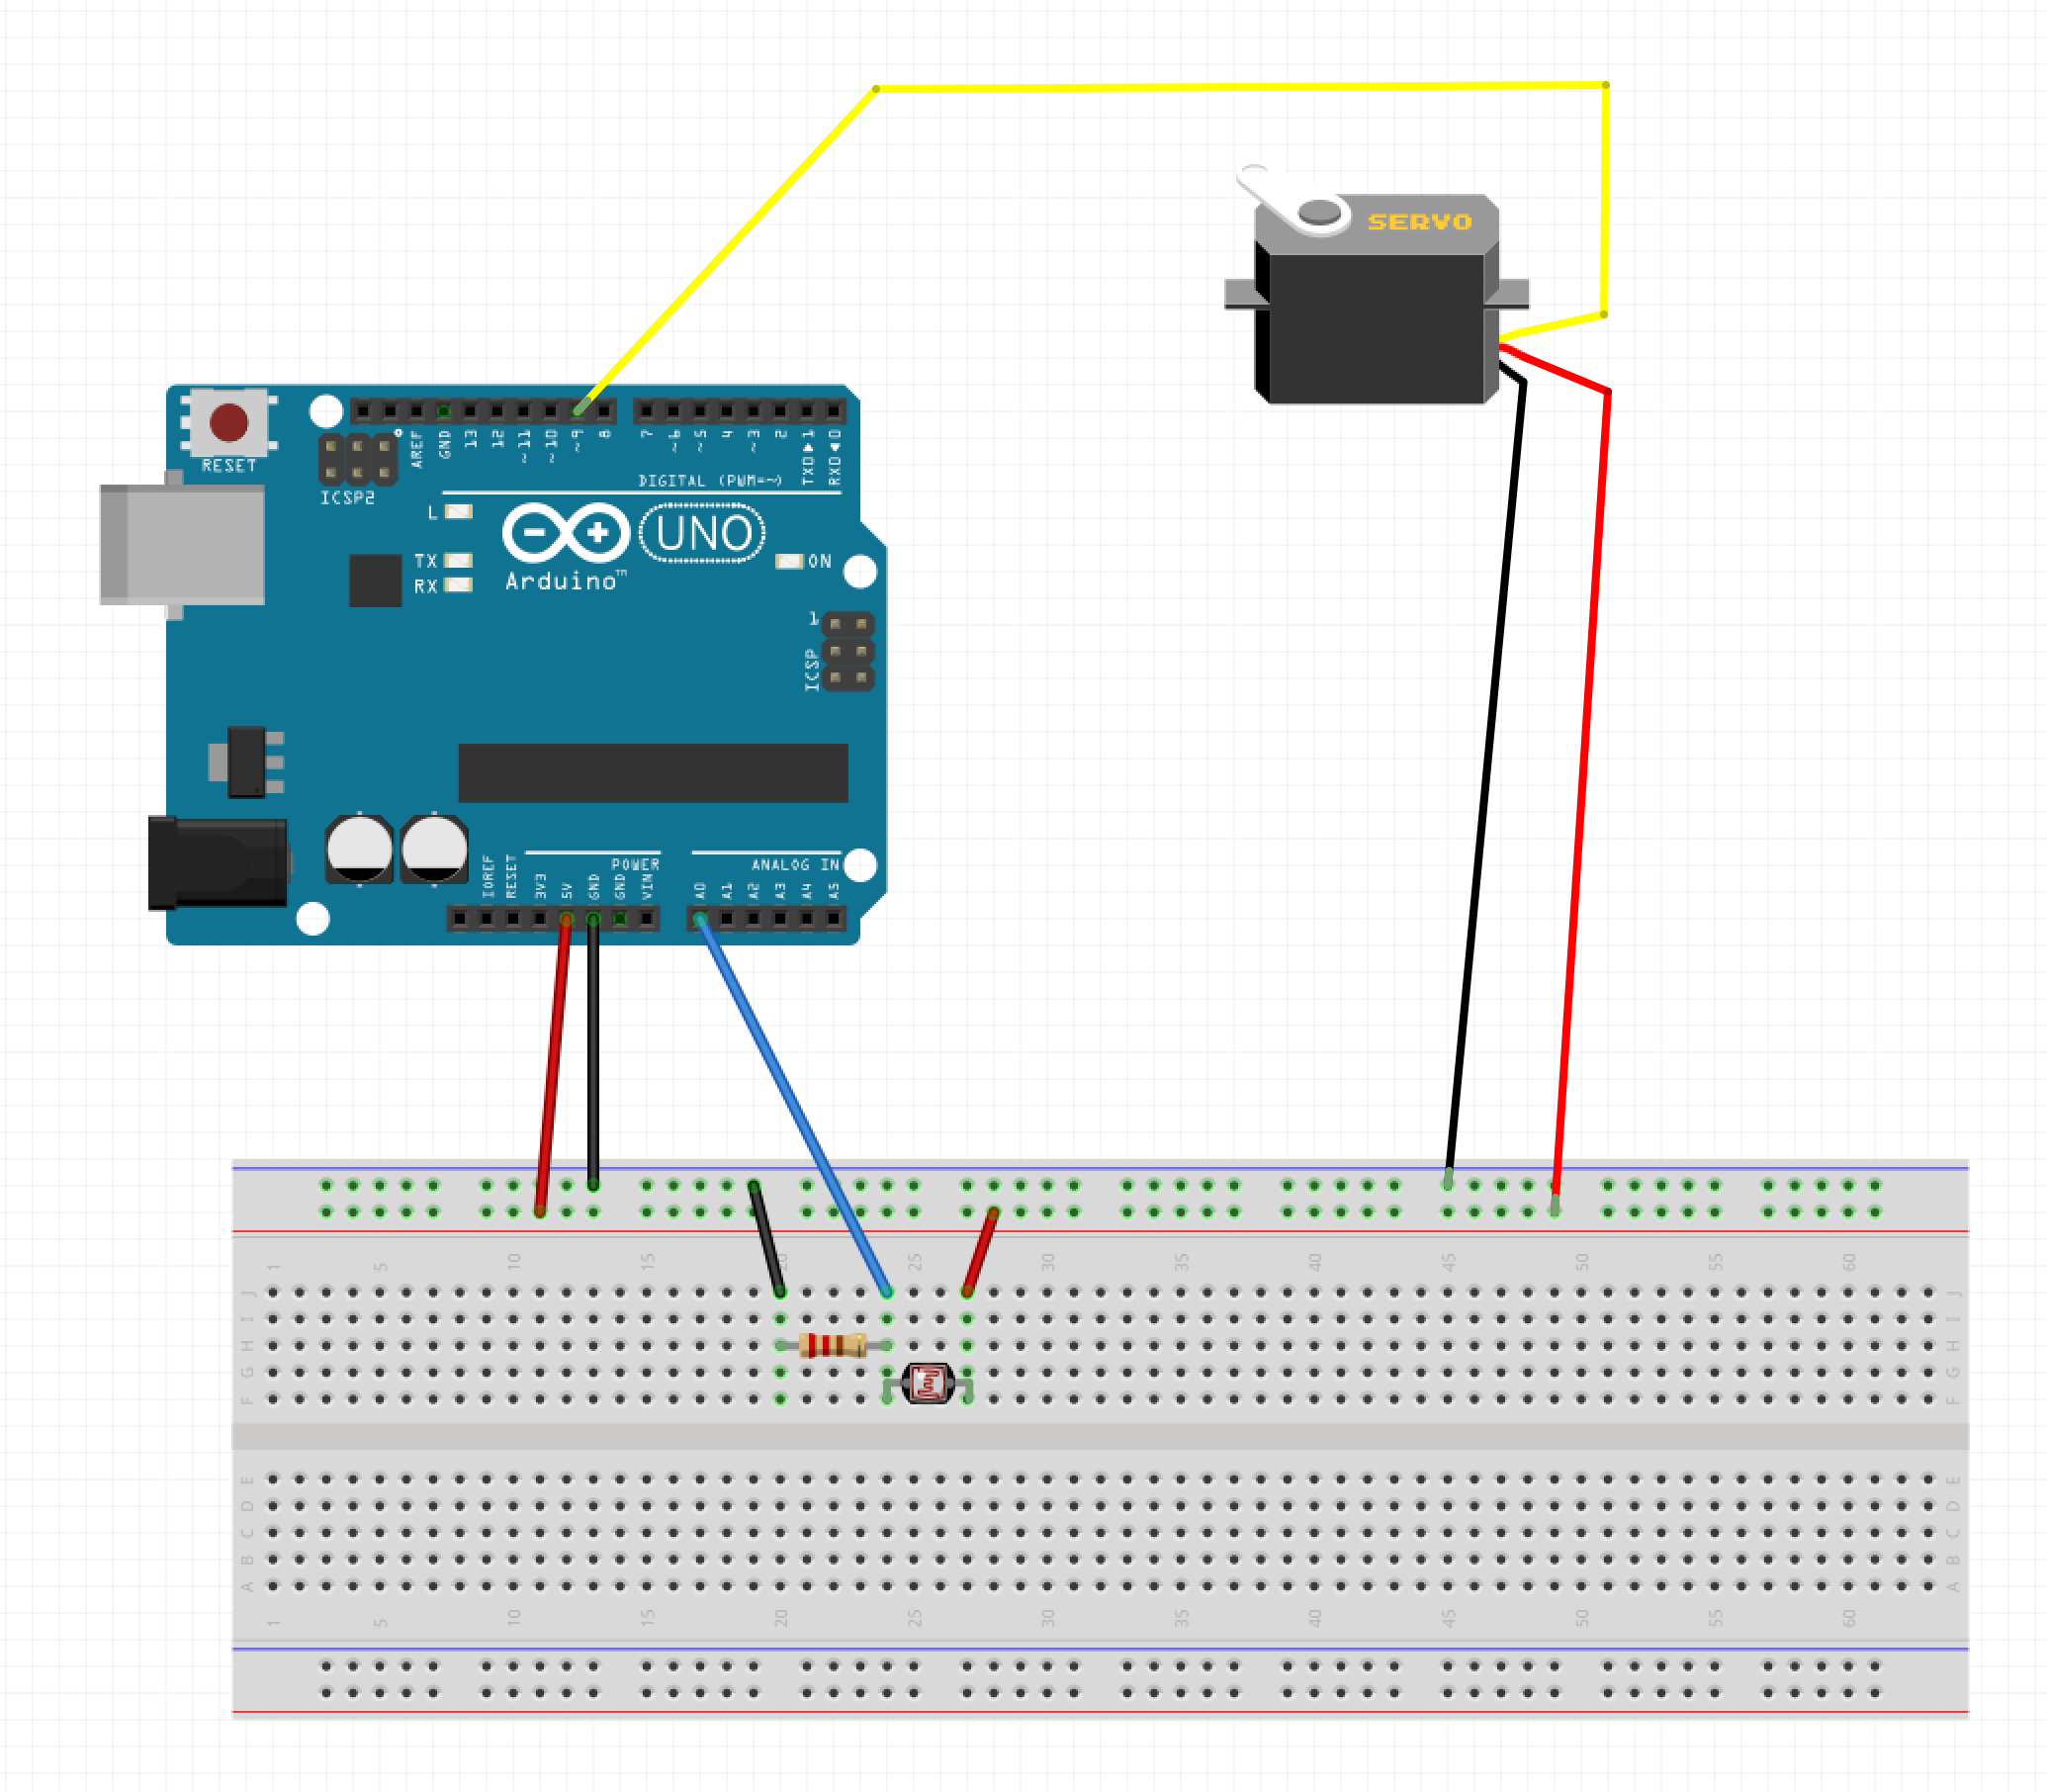 Any wire will do, and which color you use doesn't really matter, they all conduct electricity the same. # More Circuits -
Nov 15, 2017 . 1 changed file with 2 additions and 2 deletions.There are no files selected for viewing
This file contains hidden or bidirectional Unicode text that may be interpreted or compiled differently than what appears below. To review, open the file in an editor that reveals hidden Unicode characters. Learn more about bidirectional Unicode charactersOriginal file line number Diff line number Diff line change @@ -51,6 +51,6 @@ There are a plethora of projects around the Internet that use Arduino at their c * [The Arduino IDE](https://www.arduino.cc) (it's free!) * [Fritzing](http://fritzing.org) (used for the circuit) -- David Stillman [email protected] -
Nov 15, 2017 .There are no files selected for viewing
This file contains hidden or bidirectional Unicode text that may be interpreted or compiled differently than what appears below. To review, open the file in an editor that reveals hidden Unicode characters. Learn more about bidirectional Unicode charactersOriginal file line number Diff line number Diff line change @@ -0,0 +1,56 @@ # Arduino Class 10/28 Thanks for attending the Arduino class! You might be wondering what the little circuit board your child brought home is and what it's good for. The board is called an **Arduino** and it's a programmable microcontroller, which is just a fancy way of saying it's a little computer. During class we all programmed them together to take a reading from a light sensor and activate a servo motor if a threshold was reached. In practice, this made for a super simple motion detector to make a head turn or a pumpkin move if it 'sensed' a shadow. The code is written in an Arduino variant of C++ that we uploaded using the Arduino IDE. The entirety of it is as follows: ```arduino #include <Servo.h> Servo myservo; void setup() { // put your setup code here, to run once: Serial.begin(9600); pinMode(13, OUTPUT); myservo.attach(9); } void loop() { // put your main code here, to run repeatedly: int reading = analogRead(A0); Serial.println(reading); delay(100); if(reading < 800) { digitalWrite(13, HIGH); myservo.write(0); } else { digitalWrite(13, LOW); myservo.write(60); } } ``` The circuit, which is put together on the breadboard with jumper wires, looks like this:  Any wire will do, and which color you use doesn't really matter, they all conduce electricity the same. # More Circuits I encourage you to download the free IDE linked below and try to recreate the circuit, or extend it! A great place to get started is go to `File -> Examples -> Basics -> Blink` which can run on the hardware with no additional circuitry. Plug in the Arduino to a computer with the USB cable and press `Upload` and watch the built-in LED! There are a plethora of projects around the Internet that use Arduino at their core, everything from weather stations to mobile robots to weather balloon payloads. Look around and don't hesitate to reach out if you have any questions. # Links * [The Arduino IDE](https://www.arduino.cc) (it's free!) * [Fritzing](http://fritzing.org) (used for the circuit) -- David Stillman [email protected]